If your hardwood floor starts to look worn out, you can restore its appearance without having to replace them.
This, however, comes at a cost; hiring pros to refinish your hardwood floor can cost anywhere between a few hundred to a couple of thousand dollars, depending on the size of your home.
This is why most people opt to sand their floor’s themselves. With the right preparation, it shouldn’t take more than four days to sand an average-sized home hardwood floor.
Small sanding projects can be done with an orbital sander and doesn’t call for heavy-duty equipment, such as a drum sander; if you want to learn how to sand hardwood floors with orbital sander, keep reading.
Related: How to sand hardwood floors with a palm sander
How To Sand Hardwood Floors With Orbital Sander
Table of Contents
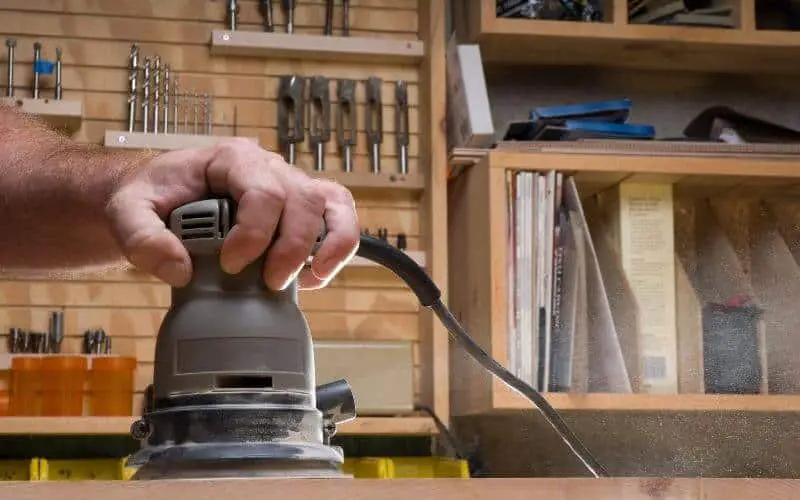
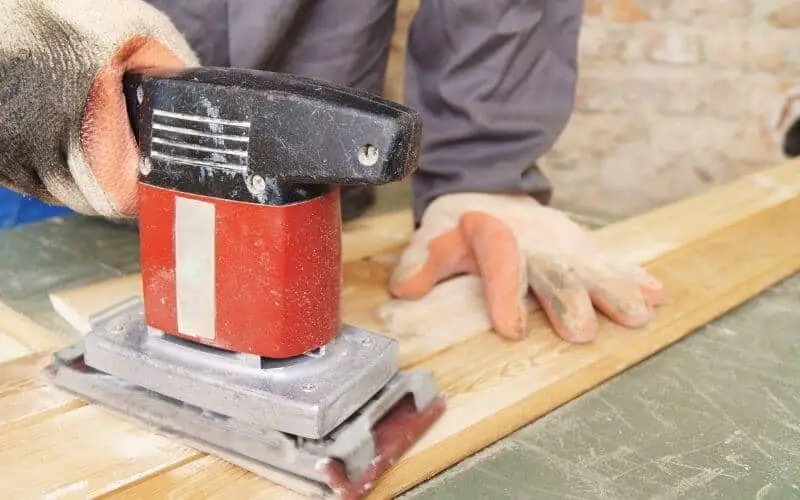
An orbital sander, unlike a floor polisher or buffer, does not involve a large, rotating sheet of sandpaper; it does not move in circles. Instead, it’s more like a vibrating sander and makes short orbits as frequent as 3,450 orbits per minute.
Orbital floor sanders are quite heavy to pick up, but once they are turned on, they slide easily across your floor.
Keep in mind that you may not be able to plane down imperfections in your hardwood floor, as you would do when you make use of a drum sander.
But on the brighter side, the chances of accidentally gouging deep valleys into your flooring as drum sanders can do is greatly reduced.
If you have decided to sand your floor yourself using an orbital sander, it’s important that you follow the right steps in order to achieve the best results.
So, with that in mind, here is our step-by-step guide on how to sand hardwood floors with orbital sander.
1. Prepare the Floor
Take out all the items in the and ensure the room is completely empty, also take out the blinds and drapes as well.
A lot of dust is generated during the sanding process, and it will settle everywhere possible. If there are some unmovable items, you can lift them 4 feet off the ground and wrap them in plastic sheeting.
To find areas of the floor that needs the most sanding, you can gently run your hand across the surface and get a feel for the roughest parts of the floor.
You can also lay your head sideways and observe the floor from a ground-level perspective.
Related: How to move furniture without scratching floor
2. Wear Safety Equipments
Before you begin the project, ensure to use appropriate PPEs, including goggles, a facemask, earplugs, and gloves to protect you from the dust and loud noise.
Lots of dirt and debris particles go up in the air as you sand, so without wearing the appropriate safety gear, you may inhale hazardous pollutants.
Also, keep the doors and windows in the room to let in air, so the dust disperses quickly. Ensure to wear appropriate clothing and use knee pads to keep your joints from having direct contact with the floor, so you don’t end up with joint pains after working solidly for days on end.
3. Consider the Floor Thickness
Most hardwood floors have a minimum thickness of 0.75 inches thick; this enables them to be sanded down a couple of times.
If your floor is less than 0.75 inches, then you might want to call in a professional, as sanding it yourself can cause great harm to your floor.
Related: Pros and cons of plywood floor
4. Choose the Right Sandpaper
When sanding your floor, you will need several grits of sandpaper, they are available in different grades, and it is important that you get the various choices as you work in order to achieve the best results.
Start sanding the floor with coarse grit to remove the old finish and smooth out blemishes. If your hardwood was painted, using coarse grit paper can remove several layers at once. Start with a 20 or 40 sandpaper grit to achieve the best results.
If the floor has old varnish, use a minimum of 36-grit. Then finish the floor with 100-grit sandpaper.
Read: How to fix uneven stain on wood floor
5. Sand the Floor
As you sand the floor, move the orbital sander along in strips like you are mowing a lawn, overlap the lines by half the width of the sander. Glide the orbital sander over the floor several times to get the floor as smooth as possible.
Start with coarse grit for the first few passes, then swap to a finer grit for the finishing pass. Each time you add a new grit, ensure to vacuum up the dust generated from the previous sanding to prevent it from affecting the way the orbital sander works, which can increase the chances of marks.
Get into the floor’s perimeters and sand the corners, although you may need sandpaper and a sanding block to manually do this.
6. Clean Up the Dust
When you have achieved a satisfactory result, vacuum all the dust and use a damp cloth to wipe away the residue. You can also make use of a tack cloth, but it should only be used once you have vacuumed first.
After removing every speck of dust, you can proceed to the next phase.
Related: How to clean painted wood floors
7. Apply a Sealer
It’s possible to leave your floor unsealed and the natural wood exposed, this is aesthetically pleasing, but it will damage quickly. Footwear and constant traffic can dent the floor.
You can reseal your floor using an oil-based polyurethane sealer to achieve a hard-wearing surface.
Put on gloves before you begin resealing to prevent the sealer from irritating your skin. For areas where there is low traffic, you can use a water-based sealant.
Start seaming the floor from the farthest end of the room, and work your way back towards the exit. Spread the sealant evenly on the floor, and it dry for 48 to 72 hours.
Read: How to stain maple floors
Frequently Asked Questions
How Long Does Sanding A Floor With An Orbital Sander Take?
The amount of time it will take to sand a floor depends on how large the room is. On average, it will take anywhere from 1-3 days to completely sand a room. This also takes into account the recommended breaks to take as you do the job.
Is An Orbital Sander Better Than Drum Sander?
A drum sander gets the sanding job a lot quicker, but it can cut into the wood of your hardwood floor; there is more of a chance that you can damage your floor while using a drum sander. This makes an orbital sander the best choice for sanding hardwood floors.
Should I Sand My Floorboards Before Painting?
Sanding is not completely necessary when you intend to paint the floorboards, but it is recommended. Sanding your floor gives you a smooth surface to easily apply your paint. If you don’t sand your floorboards before painting, your painting job may turn out uneven.
Read: Can you paint or stain laminate floors
Conclusion
This is a complete guide on how to sand hardwood floors with orbital sander, so if you have been wondering how to sand a floor by hand, this article breaks down the steps so you can carry out your refinishing project effortlessly.
Just in case you are sanding yourself and wondering the right sander to go for between orbital and drum sander, or top pick is the orbital sander.