When you think of sanding hardwood floors, you probably imagine having to pull heavy-duty drum sanders and other heavy-duty sanding machines.
Fortunately, that’s not true; although the classic sanding project will require the usage of heavy-duty sanding machines, it is not the only option for sanding wooden floors.
Sanding hardwood floors with palm sander is a great way to refinish your floor, although it is a lot of hard work and requires a lot of time, energy, elbow grease, the results are usually more efficient and more detailed.
Read: How to refinish terrazzo floors
Sanding Hardwood Floors With Palm Sander
Table of Contents
Sanding a floor by hand enables you to pay more attention to details, and you are bound to achieve more flawless results.
Sanding hardwood floors with palm sander is a detailed and more complex job, and you get more and better control over the machine when working by hand and with smaller and more mobile machines.
What is a Palm Sander Used For?
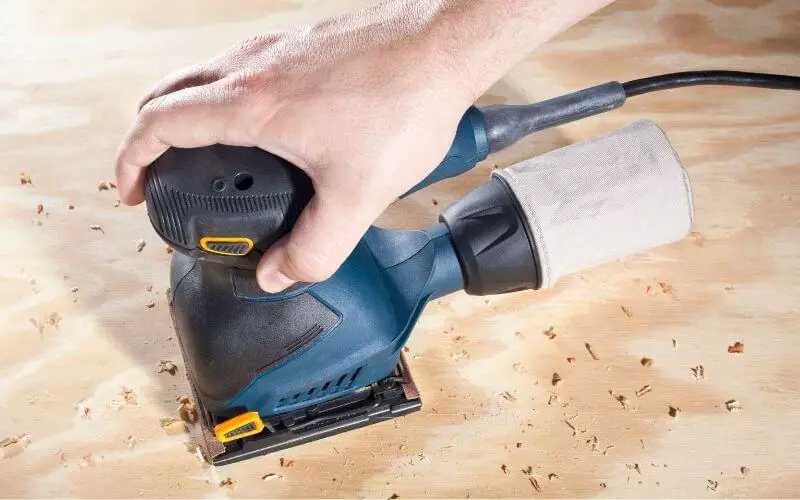
The palm sander is the most common tool for sanding a hardwood floor by hand. Palm sanders oscillate, so the pad of the palm sander is fixed straight.
This gives the palm sander a little bit more aggression and power, making it a great tool for removing old finish, dirt, and other imperfections on a floor surface.
To achieve flawless refinishing with a palm sander, you should use it with a coarser sandpaper grit. Its square edges enable you to use a palm sander to sand right into the corners of the floor.
Read: How to refinish pine floors
How to Sand a Floor by Hand Using Palm Sander
Clear and Clean the Area
You need to prepare the area you will be sanding and refinishing begin you begin the process. This you should do by clearing out the area, remove rugs, furniture, and other items from the hardwood floor area that you will be working on.
Then with a vacuum or broom, thoroughly clean the floor. Eliminate every dust and debris on the floor before you begin refinishing.
With finishing nails, secure any loose floorboards in your hardwood flooring.
Read: Should you dust or vacuum first?
Prepare Accordingly
When sanding your floor by hand, you will need to observe proper precautions as you would with any other home improvement projects. It is useful to have a helping hand to help lift any heavy equipment or furniture when working on the floor.
As you sand, apply varnish or clean up throughout the project ensure to use proper form while you are bent over, this is to prevent you from experiencing back pains and getting exhausted too quickly.
You need personal safety equipment such as respirators, dust masks and earplugs as you sand because sanding hardwood floor generates a large amount of dust and fumes.
You also need to wear organic vapor respirators, neoprene or vinyl gloves, and eye protection with splash guards when applying sealers and oil-based polyurethane.
You as well need to place plastic sheeting over every item in the room to prevent the spread of dust. Cover up air vents; make sure to use the right type of plastic sheeting based on the desired durability.
Read: What is the most durable hardwood floor?
Use the Right Sandpaper and Begin Sanding
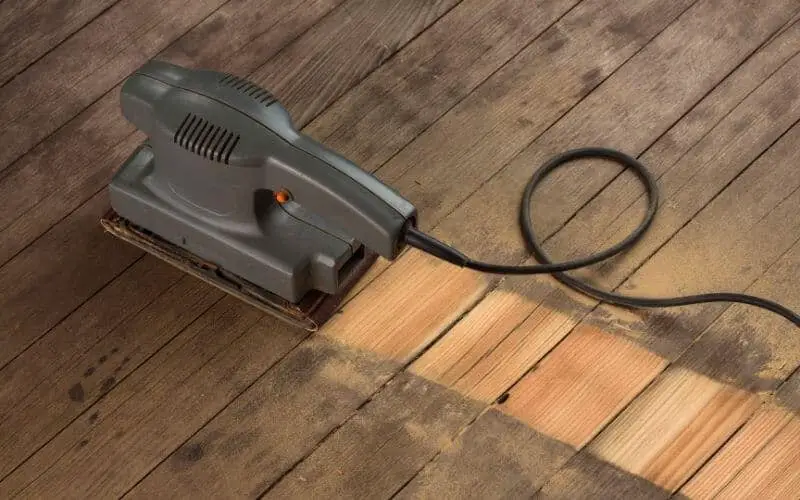
Start sanding your floor with coarse-grit sandpaper; the few first passes should remove the old finish and most surface scratches. However, avoid using grits coarser than 60, as they can damage your flooring.
Use the abrasives to gradually sand your floor until they become finer and reach the desired degree of smoothness.
Follow a simple progression with the sandpapers, begin with a 60-grit abrasive, before moving to 80-grit, then finish up with 100- or 120-grit.)
Move the palm sander through the floor row by row, overlapping runs by half the sander’s width. Ensure to make numerous passes with each grit.
Use the palm sander to sand near baseboard moldings, or you can use a sharp scraper or putty knife to take out any old finish areas that the sander may miss. Using a scraper enables you to get into recesses without having to sand off too much wood.
Read: Can engineered wood floor be refinished?
Clean Up Dust And Hair
When you’re done sanding, use a vacuum to remove all the generated dust and wipe the sanded areas with a tack cloth.
Cleaning your floor thoroughly after sanding is very important as any dirt that is left on the floor surface will become embedded in the finish, and you will need to re-sand the area to remove it.
If you spot an embedded dirt particle on the floor just before applying the last coat of polyurethane, you can take it out by lightly sanding over the area with a very fine (320) abrasive, then carefully dig out the particle with a pin or fingernail, if possible.
Finally, with the same abrasive resand with the area taking care not to breach the stain layer. When you apply the final coat of polyurethane, all the marks will become blended in with the rest of the floor.
Read: Best mop for pet hair
Apply Sealer
Apply a sealer coat on your floor is totally optional and can be skipped if your floor takes stain evenly, but it is recommended as it helps to ensure even stain coverage.
To test if your floor needs a sealer application, apply the stain to an area that will be covered by furniture. If it needs a sealer, then ensure to apply the sealer evenly.
A sealer prevents stop marks and lap marks to show through after staining hardwood floors.
Read: How long does polyurethane take to cure
Apply Wood Stain Evenly
You can find it quite challenging to apply wood stain evenly, especially if you are covering a large expanse.
The best technique to apply wood stain is by using an applicator to stain one small section at a time and then rub off all excess stain with a rag.
Do not allow the edge of each section to dry before moving on to the next; this is to avoid ending up with lap marks. Oil-based stains stay wet and workable longer than water-based stains.
Apply a Layer of Polyurethane
Most professionals like to pour polyurethane directly onto the floor and then spread it with an 18-inch lamb’s wool applicator, but this might be too complicated for a DIYer, and it may result in an overly thick layer of polyurethane.
The best way to do it is by rolling on the polyurethane using a foam roller, preferably a high-density foam roller.
This will ensure that the coats are thin, even and will quickly dry to a glassy smooth finish. To apply the polyurethane around edges and hard to reach areas, you can use a brush.
Read: How to fix uneven stain on wood floor
Conclusion
Sanding hardwood floors with palm sander is an easy way to refinish your floors yourself, especially if you are dealing with a small area or you don’t want to spend thousands of bucks hiring the services of professionals.
Also, sanding hardwood floors with a palm sander can be quite interesting as this isn’t as hectic as using heavy-duty sanding machines.