It’s pretty normal for your flooring to appear a bit dull and unattractive due to wear and tear. This thus brings us to the question; can you paint or stain laminate flooring?
Of course! It is quite practicable to paint or stain laminate flooring to restore its shine whenever it gets dull due to wear and tear.
This post will provide a step-to-step guideline on how to paint or stain laminate flooring effectively.
Related: Is laminate flooring toxic?
Can you Paint or Stain Laminate Flooring?
Table of Contents
There are thousands of reasons why you may way want to stain or paint laminate flooring. Due to wear and tear, it’s entirely possible that your glossy flooring will turn into a dull attractive shade.
The scratches, wear, and tear will significantly affect the visual appearance, which might indirectly mean that it’s time to update the paint.
Old floorings are usually difficult to clean, which necessitates the need to paint or stain them. While it is absolutely possible to paint or stain laminate flooring, care must be taken not to cause further damage to it.
A gel stain or latex paint can be used to paint laminate flooring after sending sanding and priming.
How to Paint or Stain Laminate Flooring
Luckily, you can paint or stain laminate flooring yourself! Yes, if you are passionate about embarking on your house improvement project (probably because of how rewarding and satisfactorily it is), then this post will be pretty valuable too. Below are the steps to follow in painting or staining laminate flooring.
Get the Needed Items
It goes without saying that before embarking on any project, you need to assemble all the required materials. In the case of painting or staining laminate flooring, you need to get the following items:
- Machine sander
- Sandpaper
- Wood primer
- Floor paint or porch paint
- Paint roller
- Polyurethane sealant
- Angled paintbrush
1. Remove All Furniture and Clean the House Thoroughly
It goes without saying that before you paint or stain your floor, you need to clear the room of absolutely everything to create space. Also, ensure to avoid scratches when moving furniture to keep the job less stressful.
Ensure your floor is sparklingly clean before moving to the next step. You can either wash the floor thoroughly with copious amount of water or use a soft broom or a good dust mop to clean it. Ensure to remove all debris stuck on the floor and pay attention to dirt in hidden corners.
2. Repair All Dents and Cracks on the Floor
Before you paint the floor, you will need to inspect it for any crack, chips or dents. For minor damage, you can fill it in with laminate floor patching material. If the crack is a tad excessive, you will need to replace it with planks.
Laminate floor patching material can be purchased from most home improvement stores. Use a putty knife to fill up the crack and let it dry for at least 24 hours before the next step.
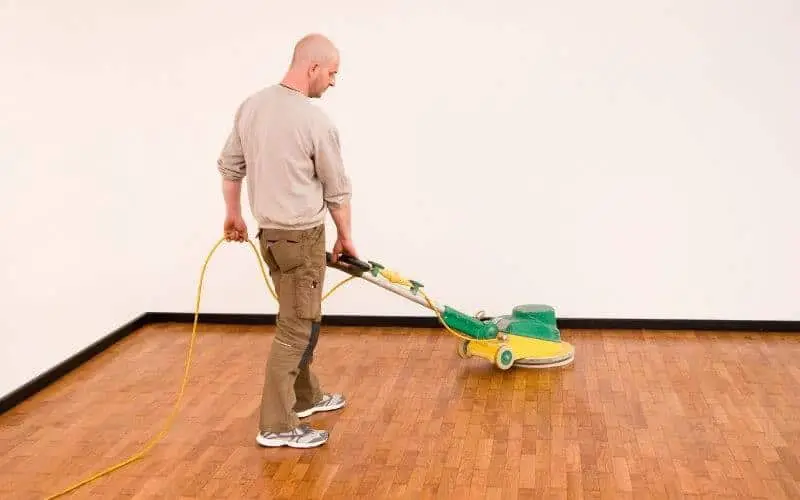
3. Start Sanding
Before painting or staining your laminate flooring, you will need to sand it. You might ask, what is the essence of sanding? Why can’t you just start painting? The importance of sanding is to remove the laminate’s wear layer so that the floor will hold the new paint.
You will need to sand down to the wooden material. Get 220-grit sandpaper and rub it over the floor in a circular motion, smoothing out any small bumps or imperfections.
Related: How to sand wood floor with palm sander
4. Clean Up Sand Dust
Once you’re done sanding, the next step is to clean up the floor of all sand dust. Using a damp washcloth or mop, wipe off any residues of sandpaper dust.
You should clean thoroughly and meticulously, making sure to clean up all debris. You don’t want any particle compromising the newly painted floor and giving it a gritty look or feel.
5. Apply the Primer
Before this step, you need to make sure that the floor is completely dry and free of any debris. Make sure to get an oil-based primer (you need to get a quality, expensive primer that will do the work).
Using a foam brush, dip it into your oil-based primer and apply a thin coat over the surface in long strokes. It is advisable to allow the primer to dry for at least 24 hours before painting.
If you’re in haste, make sure to leave the primer dry out for at least 30-60 minutes.
6. Now it’s Time to Paint
This should definitely be the most fun part of your project – painting! It is recommended that you apply the first coat of paint and allow it dry before applying the next coat.
You can apply 3 to 4 coats of paints, depending on how bold of a color you want the painting to appear.
Go for polyurethane-based paint, which can be purchased in most stores. Ensure that the foam brush you’re to use in applying the paint is clean and free from any debris. If you’re sensitive to the paint’s smell, wear a respirator or nose mask while you work.
7. Apply Polyurethane-Based Sealant
After applying your desired coats of paints, allow it to dry completely before applying your sealant. A polyurethane-based sealant is recommended for polyurethane-based paints.
Applying sealant after the painting is extremely important because it protects the paint from cracks and wears and tear from foot traffic and furniture.
Related: How long does polyurethane take to dry?
9. Now you can Move in your Furniture
Once the sealant coat is completely dry, nothing stops you from bringing in your furniture! Take special care not to drag furniture over the floor but to lift and set it into place instead.
Mistake to Avoid While Staining Laminate Floors
As a newbie, you will need to take extra steps not to make some common mistakes. Although, it can be argued that some of these mistakes will provide you with the required experience to do a better job next time.
However, we want you to achieve a flawless job on your first try! Below are some mistakes you want to avoid:
1. Use a Mechanical Sander to make the job easier for you: as a newbie, you don’t want to make any mistake, and the mechanical sander will save you lots of stress and make the job way easier for you.
2. Clean the house meticulously before painting: little debris like pet hair or sandpaper dust can mess up your hard work! Make sure to have the floor completely spotless before painting.
3. Get Quality Paint: most people are tempted to get wall paint for their laminate flooring because it is cheaper. You don’t want to make that mistake! Wall paint will not last when applied on the floor, and it’s susceptible to peeling and rippling.
4. Priming is a must: after sanding, you might be excited to start painting almost immediately. You don’t want to do that! Priming helps the paint to adhere or stick firmly to the floor.
Make sure to get quality primer – most preferably an oil-based primer. Also, ensure that the primer dries before applying the paint.
5. You can either use a paintbrush or roller but not both: while there is nothing wrong with using both a paintbrush or roller on the same project, it is advisable to use just one. Either way, always make sure that that the paintbrush or roller is free of any debris.
6. For floors with minor dents or cracks, make sure to fill them in with laminate floor patching material or planks if the damage is excessive. However, sand it gently not to damage the laminate floor patching material.
7. use a tap to cover unwanted areas to prevent accidental painting or staining.
Related: How to achieve a shiny laminate floor
Conclusion
Now you know the answer to the question, can you paint or stain laminate flooring? If you’re interested in staining or painting your laminate floor, this post has provided all the information you need on how to paint or stain laminate flooring.
As a newbie, this should be a fun and exciting project for you! We sincerely hope that the information here will minimize the outcomes of some mistakes that are bound to happen while you embark on this project.
It is advisable that you start painting smaller spaces (like your closet or store) before moving into larger areas. This will help minimize any mistakes and give you the much-needed experience. Good luck!

