Worn-out floors with dents and cracks will make your home look unattractive, which probably signifies that it’s time to change your current flooring.
If you are thinking of installing plywood flooring, then you’re on the right track. There are thousands of reasons why plywood flooring is a better option for you.
First and foremost, at $36 per sheet, plywood is pretty affordable, not to mention its great aesthetic value.
There are various methods on how to install plywood flooring in your home. As a beginner, who is excited about starting a home improvement project, you can install plywood flooring yourself. This post will provide a step-to-step guide on how to plywood flooring.
Installing plywood flooring involves cutting the board with a miter saw and laying it on the floor. You will also need a nailer to affix the plywood in place. Now, let’s get to more details.
Read: Pros and Cons of Plywood flooring
How to Install Plywood Flooring
Table of Contents
As mentioned, there are various installation methods used to install plywood. The most common method being the floating install and the least most common way being the nailing method. Below is a step-to-step guide on how to install plywood flooring.
1. Know What You Need
You can’t just move in headlong into installing plywood flooring in your home. First and foremost, you need to familiarize yourself with the required materials and tools.
The basic materials required in plywood installation include a miter saw, nailer, tape measure, spacers, plywood strips, underlay, and sandpaper.
2. Create a Budget
You can’t embark on any home improvement budget without creating either a physical or mental budget.
To get a fixed amount of the entire cost of your project, you might have to visit some home improvement stores and create a rough estimate of the costs of the needed materials.
Once you have arrived at a rough estimate of the cost of each needed material, it’s then time to start measuring your room and calculating the amount of wood you’ll need.
The pieces of plywood you will need are totally dependent on the size of your room.
3. Clean up the Room
Changing your carpets or rugs for plywood flooring involves cleaning up the room and keeping all debris out of the floor.
You have to clear up the space of all equipment like heavy furniture, chairs, beds, etc. The floor needs to be completely flat and even before you lay your plywood.
Related: How to move furniture without scratching floor
4. Lay a Thin Layer of Underlay or Roofing Sheets
This step is entirely optional but will help smoothen out any minor imperfections and help with sound minimization.
For roofing sheets, you can get the minimum OSB panel size which is 24 inches. The roofing sheets can be laid in any direction, and each sheet end must rest on a rafter.
About a 1/8-inch gap should be made between the panels in each row. Nail the panels to the rafters making sure that they are about 6 inches apart on the extreme and about 12 inches apart in the middle.
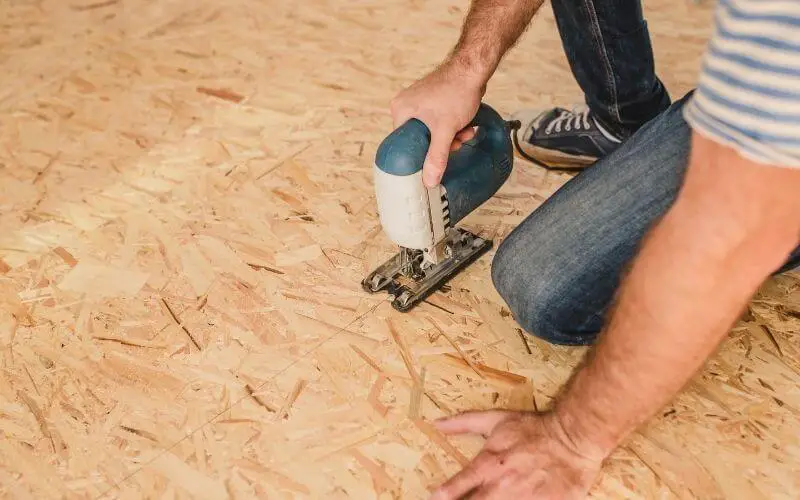
5. Cut the Boards
At this point, the miter saw becomes essential as it is used to cut the boards to the required length. When cutting, make sure to leave a slight edge around the room for the wood to expand into.
After cutting your boards, it’s time to lay them on the floor. It is important to lay everything on the floor before actually nailing them to the floor.
This is important because you are able to make sure that the boards are evenly set out on the floor.
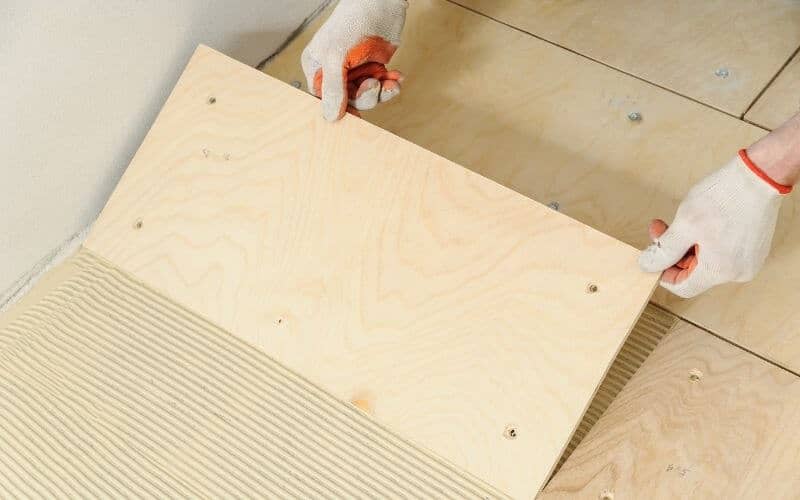
6. It’s Time to Attach the Plywood
At this point, you will appreciate the importance of the nailer, which automatically becomes your favorite new power tool.
A nailer will definitely make the whole project way easier for you. However, you will need to be careful not to damage any cables or plumbing underneath!
More so, the nailers are just precisely what you need as the tiny nails become almost invisible immediately they are affixed on the plank.
Since the board has already been laid out, all you need to do is to hold the plank of plywood in place while you worked along the length, nailing roughly every 50cm.
7. Optionally, Sanding
This step is dependent on the condition of your plywood – plywood with rough edges and areas will require sanding to smoothen it out. To avoid this step, we recommend that you get smooth plywood.
For instance, the AraucoPly, manufactured in South America, has a uniform surface and is relatively defect-free. The plywood also appears to be void-free.
8. Clean your Plywood and Move-in your Furniture
Now, you are done with installing, it’s time to give your plywood some quick cleaning and then move in your furniture.
Related: How to install hardwood floor on concrete
Mistakes to Avoid When Installing Plywood
As a newbie, the chances are that you might run into some mistakes. It is usually advisable you start with smaller spaces like maybe your closet before moving into larger areas. Here are some errors to avoid when installing plywood flooring:
1. Make sure to install your new wood planks at a 90° angle to the existing floorboards.
2. It’s recommended that you get plywood that is not too thick. For instance, a plywood board of about 5mm thick is just about what you need.
3. It is also recommended that you start at the door and work your way through to the back wall.
4. A nailer or nail gun is absolutely necessary when installing plywood flooring. The whole process will be almost impossible without a nail gun.
Attempting to use a hammer and a nail will probably take forever and will leave your entire work messy.
The nails in the nail gun can easily disappear into the floor because they are so small – in hindsight, you also get a cleaner finish.
5. Plywood floors are suitable for any room where low moisture and humidity. Plywood will not exactly be ideal for rooms with lots of water spills like the kitchens, bathrooms, and even basements.
This is because basements are naturally a bit damp, which could cause the plywood to delaminate and swell over time.
Related: How to tackle water spill on floor
Plywood Floor Finishes
When you are done installing your plywood, you might be interested in looking for great ways to spice up your flooring. Below are some options to consider:
1. Paper bagging
This involves applying irregular-shaped pieces of brown kraft paper to existing plywood for a marble-like appeal.
Firstly, once the torn pieces of brown kraft paper are soaked in a mixture of watered-down glue, allow the paper to dry up completely before adding a stain and a protective finish.
2. Wallpaper as floor paper
Wallpaper can serve as the perfect finish you need for your plywood. All you need to do is fill and smooth gaps in the plywood subfloor with a fast-setting drywall compound and a trowel. \
Then put down wallpaper in your pattern of choice, followed by three or four coats of polyurethane or other clear hard floor finish.
3. Painted plywood
You can create a myriad of designs and patterns on your plywood using few coats of polyurethane. Remember to apply a coat of primer before painting, as this will ensure the paint will adhere and help seal down any loose plywood chips.
Read: Painted wood floor pros and cons
4. Adding Planks to your plywood flooring
This might be a bit costly as hardwood planks are expensive. However, it will give your home that natural woodsy appeal.
All you need to do is cut plywood sheets into planks, squares, and other shapes, then glue or nail the pieces to the subfloor.
Related: How to install linoleum flooring
Conclusion
We want to believe that you’re well-rounded on how to install plywood flooring. As mentioned earlier, the steps and instructions given in this post will be best appreciated when you start with smaller spaces like the kitchen storage or closet.
However, if you’re keen on starting with large spaces, you will need to follow the instructions outlined in this post to the letter! Good Luck.