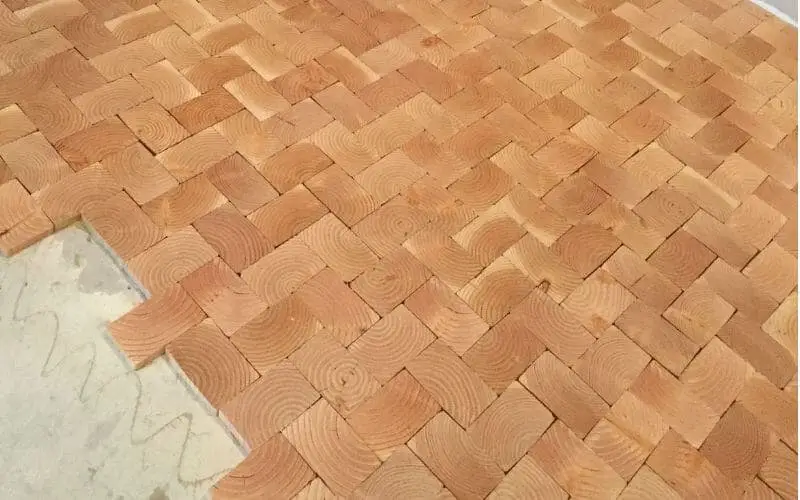
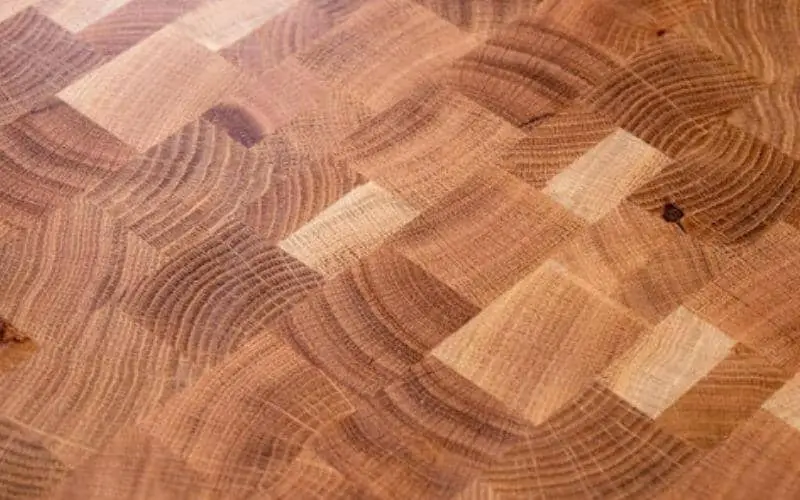
End grain flooring is an interesting and gorgeous surface; it is made of tiles cut from timber ends. Because the cuts are made across the board, it exposes the end grain on the face of the tile, just as it would be on a chopping block.
This makes the floor surface to be incredibly durable. If you want to learn how to install end grain flooring, start by researching the right installation method that meets your local building codes.
The steps involved in installing end grain flooring involves preparing and planning the floor for installation, cutting out and laying the end grain tiles, and finally sanding, finishing and sealing the floor. All these steps have been well explained below.
How to Install End Grain Flooring
Table of Contents
Prepare The Flooring Material
To achieve the best results when installing end grain flooring, you need to allow the wood products to adjust to the relative humidity of your home before installation.
Do not have the materials delivered if any plaster, ceramic tile, concrete, or other wet jobs is yet to be fully dried and cured in the area. This is to prevent the woodblock flooring from absorbing damaging amounts of moisture from the ongoing wet remodeling project.
When your end grain flooring arrives, place them in the area where they are going to be installed and allow them to sit in the area for at least one to two weeks before installing.
The area should be warm, well-ventilated, and protected from the elements. An ambient temperature of 65 to 75 degrees should be maintained before, during, the installation and up to seven days after installation.
Prepare The Subfloor
End grain flooring does not use an interlocking groove system, so it requires a stable and solid subfloor so that defects can be minimized during the installation process.
Keep in mind that it is not ideal to install end grain flooring directly on top concrete, even if it’s fully cured. However, if you intend on installing it in an area where dry concrete is present, a plywood subfloor should be installed first.
Plan The Layout
Take every measurement on the flooring in square feet. This should tell you the amount of material required to completely cover the entire floor. No consideration regarding the wood’s thickness should not be taken when calculating a square footage measurement.
Dry lay the tiles without mortar or permanent adhesives to make a layout with the least cuts on wood tiles before you begin the installation. Lay a row of wood tiles in each direction, using tile spacers in between, then mark the center of the area and take out the end grain flooring.
Measure the walls to know the halfway points of the room and divide them into four. Mark out parallel lines connecting walls to provide the starting point in squaring the room.
Take 3 feet going to any wall and 4 feet going to a perpendicular wall from the intersection points, and if the gap between the two points does not equal 5 feet, you need to readjust your measurements till you get 5 feet.
This should be done for each quarter of the room and use chalk lines to mark the measurements. After marking out your layout for the end grain flooring tiles, you can now apply the adhesive to the tile.
Ensure that the concrete slab has been finished with a trowel and is well leveled. The surface should be free from oil, stain, dust, or grease.
Prepare The Adhesives
You can usually find the mixing instructions for most adhesives printed on its package. These instructions should be followed carefully.
Use a notched adhesive spreader or trowel to apply the concrete adhesive. If in the right consistency, it should dry out in about15 minutes, but the exact time drying time may be affected by the temperature, humidity, and other similar factors in the installation area.
To test for dryness, put your hands on the tile cement; it should be tacky to the touch but not actually sticky. If the adhesive is still sticky, you need to wait a little longer. Once the adhesive is properly dry, you can begin laying your wood tile.
Lay The End Grain Tiles
Start by laying the first end grain tile at the markings you have previously made on the center of the floor area. Make sure to lay the first tile squarely with the lines; this will ensure that the other tiles will not be laid out of line.
Lay the first line of tiles towards a wall, but leave about a 3/4-inch gap on the wall line. This is to allow room for the expansion of the wood flooring. Baseboards can be used to later cover up the joint.
When laying the tile, make sure that each tile is butted against the other. Do not attempt to slide the tiles in place; instead, lay each of the tiles in their position firmly on the cement.
Cut Out End Tiles
To accurately cut out the last tile in the row, place a tile on top of the last laid tile, then butt another tile firmly against the wall.
Use chalk to mark the spot where it meets the tile you have placed squarely on the last tile in the row and cut it out. When working in a cold room, it is recommended that you warm up the tile first before cutting. This ensures that the wood fits the gap more perfectly.
After laying out the first row of end grain flooring tiles, you can now lay the rest of the tiles needed on the floor area. Due to the floor tile’s material, it is natural for them to have varying wood grain patterns, shade, and other distinguishing marks.
Do not try to match the pieces; instead, lay out the tiles in a random pattern; this will produce a more beautiful finish.
Read: How to cut VCT tiles
Sand The End Grain Flooring
After laying all the tiles, you would need to sand the floor. You are usually required to wait about 24 to 48 hours before doing so; this is to allow the adhesive agent to be fully set. You can use a drum sander with 60 grit sandpaper for this.
Depending on your desired finish, you may need to make 4 to 8 cuts. Make first cuts by going across the rows of woodblocks but make the final cuts in the same direction of the woodblock rows. You can apply wood filler to the gaps if needed.
Use a disc sander with 100 grit sandpaper to finish the sanding process. Keep in mind that using finer grit enhances the wood’s beauty but be sure not to displace any of the applied wood fillers.
When using the drum sander, ensure to wear a face mask and safety glasses to keep the dust particles out of your eyes and nose.
Finish The End Grain Flooring
After completing the sanding process, clean up the floor surface and finish the floor. Apply a stain to the floor if you wish to, and then proceed with sealing the floor.
Seal Your End Grain Floor
You can use a varnish or urethane-type compound to seal your end-grain floor. Simply spread the material on the floor and allow it to penetrate the wood. Remove excess sealer with rags or by buffing it with a synthetic pad or steel wool.
To achieve a softer and more natural finish, you can use an oil sealer. This may be colored, so it can be used as a stain too. Apply a wax finishing to protect your oil sealer, and your end grain flooring installation is done.
Read: Best floor wax for hardwood floors
Conclusion
Hopefully, you have learned how to install end grain flooring, the installation process might seem quite complicated, but with a little elbow grease and patience, your floor should be installed in no time.