
Different kinds of flooring can be installed by being glued down to the subfloor. It typically involves applying an adhesive to the subfloor as well as the flooring material about to be applied on top of it.
Pertaining how to remove glued flooring effectively, the steps to take are firstly removing the quarter-round and baseboard trim, then, removing the middle part of your flooring, and the glued part of the flooring, followed by heating the leftover adhesive before finally disposing the flooring.
This seems very easy and straightforward for the most part, but you may have a different idea if you decide to uninstall the flooring.
Not only is it time-consuming and labour-intensive, removing a glued-down flooring may ruin the flooring and make them unusable afterwards. Keep reading to learn more about how to remove glued flooring and what to do with the flooring pieces.
Related: How to Remove Parquet Flooring in 6 Easy Steps
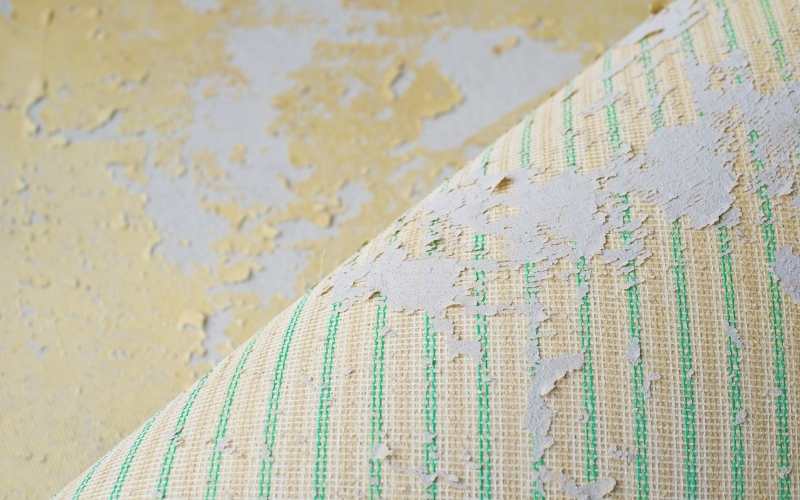
How to Remove Glued Flooring: Old Vinyl Floors
Table of Contents
There are lots of different floors that are installed using the glue-down method, and before you begin the removal process, it is necessary to don protective gear, like knee pads, protective goggles and work gloves.
Also, clear out the work area by removing any furniture or fixtures cover up any item that cannot be moved, like appliances and light fixtures.
Step 1: Remove the Quarter-Round and Baseboard Trim
If your floors have a quarter-round molding covering the space between the floor and the baseboards, use your pry bar to pull it out. Also, remove the baseboards, these are mostly installed over the flooring, so they need to be removed before starting on the flooring.
To do this, place a block of wood against the wall, two to three inches above the trim about to be removed. Next, insert the pry bar between the trim and the wall. You can gently tap the bar in with a rubber mallet if you have trouble forcing it in.
Start pulling the boards systematically off the wall, starting from one corner of the wall to the next. Pull off the baseboards slowly to avoid snapping them into pieces that are harder to remove.
Step 2: Remove the Middle Part of Your Flooring
If you have linoleum or vinyl flooring, they are probably glued only around its perimeter and, as such, easier to remove. Most times, only about a five-inch perimeter is glued down while the middle part of the floor lays loose.
For such floors, use a utility knife to cut around the flooring about seven inches away from each wall; this cut should stay parallel to the walls. Avoid cutting too deep into the floor so that you do not gouge your wood floor underneath.
Next, begin pulling up the middle part of your flooring, and it should come out easily. If you are working on a large floor, you can make the removal process easier by cutting the flooring into long, narrow strips. Pulling a short strip of flooring will be much easier than trying to pull off a long sheet.
Unless you intend to reuse your linoleum or vinyl floorboards, there’s no need to uninstall them in larger sheets. You can decide to roll up or pull back larger sheets, but the sheets can become too heavy and too difficult to manage after a while.
Read: How to Remove Vinyl Flooring Without Damaging It
Step 3: Remove the Glued Part of the Flooring
With the loose planks of your glued-down linoleum or vinyl flooring removed, you can begin removing the glued down parts. Start by using a scraper to detach the glued flooring from the wood subfloor. Hold your scraper at a 45° angle to prevent accidentally chipping the wood.
Most times, the flooring may pull off easily at this time. Depending on how the scraper was held, you may remove some of the glue alongside the flooring.
Work in small sections, using the scraping tool to pull off the flooring in short thrusts until you have completely uninstalled all the flooring. Pull back the scraped up plank as you remove the glue,
The scraper may chip away at the adhesive relatively easier if you have an old floor than newer floors.
Step 4: Heat the Leftover Adhesive
After completely removing the floorboards, you can soften the leftover hard adhesive and make it much easier to remove. You can use a heat gun set on low to gently heat up the floor.
Avoid letting the heat gun touch the adhesive; instead, hold it over the adhesive, about three and a half inches away from the floor.
When the glue softens, grab your scraper and scrape off the softened glue using short thrusts. Remember, you use the tool at 45°, so you don’t scratch or dent the subfloor or flooring.
Work in small sections of the floor at a time. If the scraper stops moving through the adhesive easily, reheat the area with the heat gun to loosen the adhesive.
Depending on how hardened the adhesive is, you may need to do a few passes over the flooring with the heat gun to completely get rid of the glue.
Step 5: Dispose of the Flooring
If you do not intend to reuse the uninstalled flooring material, you must dispose of them properly. If you had cut the floorboards into tiny strips when uninstalling them, simply fold the board strips up into accordion style.
You may not find a recycling plant in your community, so dispose of them like any other trash. However, you may want to check in with your local ordinances first before disposing of your flooring material as household trash because some places may have designated waste disposal sites for building materials.
Either way, ensure to dispose of the flooring material properly, and you can proceed to the installation of new flooring.
Read: Easy Homemade Vinyl Floor Cleaner
Conclusion
Now equipped with the steps on how to remove glued flooring, you can go ahead to pull up the existing flooring in your space; different types of flooring are installed using the glue-down method.
The installation process is typically less demanding and straightforward, but you may have a lot on your plate should you decide to uninstall the flooring. Remember to keep the scraper at a 45° angle, so you do not accidentally dent the flooding and subfloor.