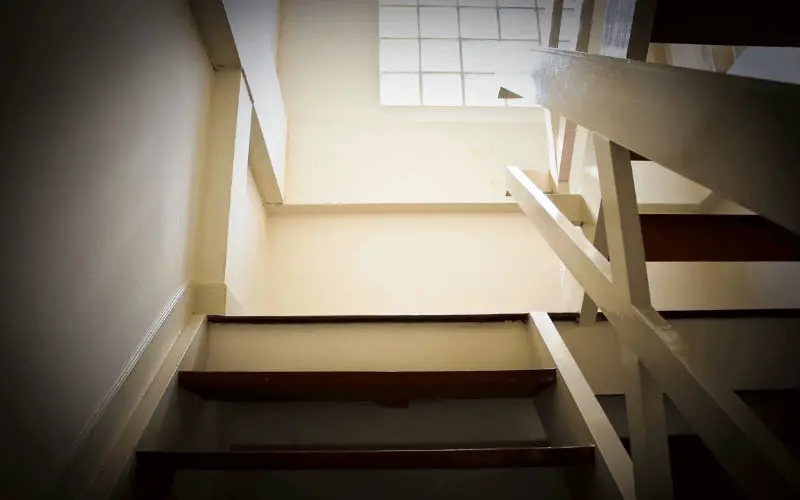
Squeaky stairs doesn’t only occur in horror movies; it can happen in your homes too! Squeaky stairs can be infuriating, especially late at night and early in the morning. However, the problem isn’t that hard to solve.
To fix a squeaky stair, you don’t really need to hire a handyman or company, as The main causes of squeaking stairs are the shrinkage of the timber treads over time and general wear and tear.
The technique on how to fix squeaky stairs requires minimal tools and experience; pretty much anyone can fix their own squeaky stairs.
How to Fix Squeaky Stairs
Table of Contents
Before trying to fix the squeaks, you have to first find out the cause and the problem area.
Cause Of Squeaky Stairs
Stairs consist of different wooden parts joined together, so due to constant foot traffic, which causes several areas of the wood to loosen, squeaking is pretty much inevitable.
This causes the wooden treads to rub against the risers and stringers, and all of it to grind against the nails and screws that hold it all together.
In addition to the effect of foot traffic, seasonal contractions and expansions of the wood also contribute to the loosening of the joints.
Stairs that were held together with glue in addition to nails and screws ( this is common to newer houses) are generally less prone to squeaking, but wear and time do tend to take their toll.
Identifying The Area Of The Squeak
To be able to identify the squeaky area, you have to know how your stairs were built; this will give you a better understanding of the job. Your stairs consist of three main parts: treads, risers, and stringers.
A tread is the horizontal piece of wood that you step on. A riser is the vertical piece of wood that rises from the back of each tread, and the Stringers are the framework that your treads and risers rest upon. If you have carpeted stairs, you have to take them off before taking up the task.
If the problem of squeakiness has been addressed before, then you’ll need to remove the supports and any glue that you used previously.
To find the squeaky area, you have to walk up and down the stairs, bouncing on the left, middle, and right sides and noting where there are squeaks. Determine the exact source of the squeaks; it is usually caused by a gap that is beginning to form between the stairs’ parts at that precise spot.
Read: How to fix gap in hardwood floor
This gap causes the stair to become loose so that one part, including the nails or screws, holding them together to rub against one other.
You will also need to check the underbelly of your stairs if you have access to it, you will need to find a partner and have them walk up and down the stairs, while you Stand under the stairs so you can see and/or hear when a step moves and squeaks.
However, If you don’t have access to the underbelly of your stairs, you can locate the riser by sight, but finding the stringers requires your ear. All you need to do is Gently tap the tread with a hammer. When one area sounds duller than the rest, this is a clear indication that a stringer is running below.
If the squeaks are coming from a number of places, you will need to keep a notepad in hand to mark a checkmark wherever you hear a squeak. When you are through, count the number of checkmarks, and you are going to use this number to work out how many pieces of timber/support you’ll need.
Tools You Will Need
Depending on the exact nature of the job taking place, you might not need some of the tools mentioned;
- Drill
- Hammer
- Painter’s tape
- Screws
- Nails
- Wood glue
- Wood wedges
Repairing Squeaky Stairs from Above
Lubricating Between The Boards
This is one of the easiest solutions to squeaky stairs, especially if each step to your stairs consists of more than one board; if the boards start to rub against each other, it can cause squeaky sounds.
You can fix this by filling the crack between the boards (tread and the riser) with a lubricant like powdered graphite or talcum powder; you do not want to use an oil-based product as it can cause the wood to warp, become sticky with dust, and it can even make the stairs unsafe by making it slippery.
Read: Best Vacuum Cleaner for stairs
To apply the lubricant, you need to first place a piece of paper against the back of the thread, then pour a small amount of the lubricant onto the paper across the entire width of the stair.
You can make use of your fingers, a stiff paintbrush, or even a tightly twisted piece of cloth to work the powder deep into the crack between the tread and the riser.
This is not a permanent solution, nor will this remove the squeaking; it only serves as a temporary solution to remove the friction from between the two rubbing wooden parts, and this helps to stop the noise.
Screwing Down Loose Threads
This is also a great method of securing the treads to the risers by screwing them down. Normally, three screws per tread are more than sufficient.
Before mounting the screws, you will need to pre-drill holes through the tread level with the riser. It is recommended to use 38mm No.8 countersunk screws. Once the screws are in place, make sure that they are countersunk below the surface of the tread.
If you have a bare staircase without carpeting, it’s best to use an appropriately colored wood filler to conceal the screws for the neatest results.
Nail Into The Risers
This is a more permanent solution compared to the others, especially if the squeaking comes from the side or back of the thread. Simply nail the tread firmly into its stringer using 8d or 10d nails (which are 2½ to 3 inches in length).
First, drill two small pilot holes on the side of the tread near the wall; they should have at least two inches space apart from each other and be drilled at opposing 45-degree angles so that the inserted nails can be aimed away from each other.
You will need to drill two more small pilot holes on the side of the tread near the balustrade. Next, drive your nails into the pilot holes, directing the nails at a 45-degree angle as described.
This tightens the tread to the stringer and, by creating a slight clamp, the nails won’t easily be pulled back out over time.
Be sure the head of the nails don’t poke up above the surface of the wood where they could injure someone’s foot; a few extra taps of the hammer should flatten them out. If desired, cover the repaired spots with a dab of wood filler or putty to hide them.
Silencing Squeaks On Carpeted Stairs
Fixing your stairs with the carpet on may cause damage to the carpet, and removing the carpet is a whole lot of work on its own; there is an easy way to this. You will need to find a kit for screwing through carpeting.
These types of kits come with screws, drill bits, and a tripod device specially designed for this task. These kits allow you to drill through carpeting while keeping the drill from damaging the surrounding fabric.
To use these kits, all you need to do is set the tripod on the tread where it needs to be screwed to the stringer or riser underneath, then Place one of the scored screws into the hole at the tripod’s center.
Start Drilling the screw through the center of the hole, through the carpet and tread, into the stringer or riser. Once you are done, Pick up the tripod, and you will find the screw head sticking out of the carpet.
Then Using the tripod’s screw gripper, break off the specially designed screw head, the same way you would open a bottled drink with a bottle opener.
Fixing Squeaky Stairs From Underneath
Applying a shim
When your partner steps on a tread, and it causes a squeak, you need to look for the gap between the tread and riser or the tread and stringer. Then Drive a shim into between the riser and the tread.
It can be quite difficult to hammer a wedge in place, so you may need to place another block of wood against the shim and hammer against it in order for the shim to go into place.
You want to be very careful and gentle when inserting the shim, only insert the shim only far enough to fill the existing gap to avoid widening the gap between the riser and the thread.
Once the shim is secure and you can’t hammer it in any further, you can cut off the protruding end of the shim if needed; you can apply carpenter glue to both sides of the shim before inserting for extra security.
You may need to nail or screw a piece of wood up against the riser and the tread if you aren’t able to get a shim in between the tread and the riser. By screwing or nailing a piece of wood in place, you are securing both the tread and the riser.
If you have only a loose riser, you can fix it by driving a screw into the back of the riser, and through the step below will hold it secure.
When you’re fixing a squeaky carpeted stairs from above, it may be necessary to pull back the carpeting as You’ll need to drill holes at an angle into both the tread and the riser. Also, To prevent the wood from splitting and getting damaged, you will need to drill pilot holes.
You will need screws or nails that are long enough to reach both the tread and the riser under the drilled holes. You can countersink the screw by placing it below the outside of the tread, so it doesn’t stick out. A piece of wood nailed or screwed to the underside of the tread can also silence up any squeaks you hear.
Applying Adhesive Glue
If the squeaks are being caused by a long gap in the steps, you will need to use polyurethane construction adhesive or carpenters glue to fill the gaps.
Although polyurethane construction adhesive is usually more recommended due to its strength and it fills gaps more efficiently so that they become hard enough to walk on. But in its absence, carpenters glue will do just fine; you can even make use of glue blocks.
Apply the glue and try to avoid air bubbles during application, then Place a heavy object on the stair to hold it in place while the glue dries; you want to make sure the tread above rests flush against the riser.
Supporting The Thread
If the stringer or riser has lost its shape or has warped due to wear and tear, you can give it a bit of support by nailing or screwing a bit of fresher bit of wood for the thread to rest upon.
To do this, you need to Cut a wooden board to the needed length. Then apply some carpenter glue or construction adhesive to the side that will make contact with the tread.
Then Place the wooden board flat against the stringer or riser, with the top pressed firmly against the tread. You can also nail or screw the board into the stringer or riser for added support.
If you still experience the squeaky noise after doing this, then you may need to replace the worn riser or tread as This method is only meant to eliminate gaps caused by wear and tear or warping, not to reinforce the strength of weak stairs.
Read: How to carpet stair treads
Conclusion
How to fix squeaky stairs can seem like a whole lot of steps and procedures, but it is actually easier than it seems, and way less frustrating than waking up the whole house when you try to sneak your way into the kitchen for that late-night snack.
If the fixes given above could not help quiet loose or warped stairs, you might need to replace risers or treads on your steps if the squeaking continues.


