People that are meticulous about the appearance of their tile floor must know how to change grout color. Tile grout is schemed to linger a long time, but it does not stay forever.
Before grout starts to damage, it will evolve into discoloration and turn out to be gloomy. Grout blemish is an unavoidable part of retaining tile floors, backsplashes, walls, or counter, and few homeowners do not want this or want to change the grout color.
Grout accumulates grime and slime. Irrespective of how frequent you seal the grout and no matter how often you scrub the grout, you will still end up with dingy, dulled grout.
After some time, scrubbing and cleaning your tiled floor or wall and the embedded grout may not be adequate to retain the color. Whether you have tile grout issues or do not prefer your grout color, it is practical to change the color without removing all of your tiles.
Before you know how to change grout color, it is essential to discover if the grout you want to color is raw or unnatural. Occasionally, the grout may be generated from silicone or other inorganic materials.
This type of grout will not take in color; but, if your grout is made of stone or cement, the grout color you want will stay on it.
You can handily know how to change the grout’s color to hide its dinginess and discoloration using these methods below to clean, stain, and seal your existing grout.
You can change your color in two ways; removing and replacing the grout and changing the grout color to a darker or lighter one.
How to Change Grout Color
Table of Contents
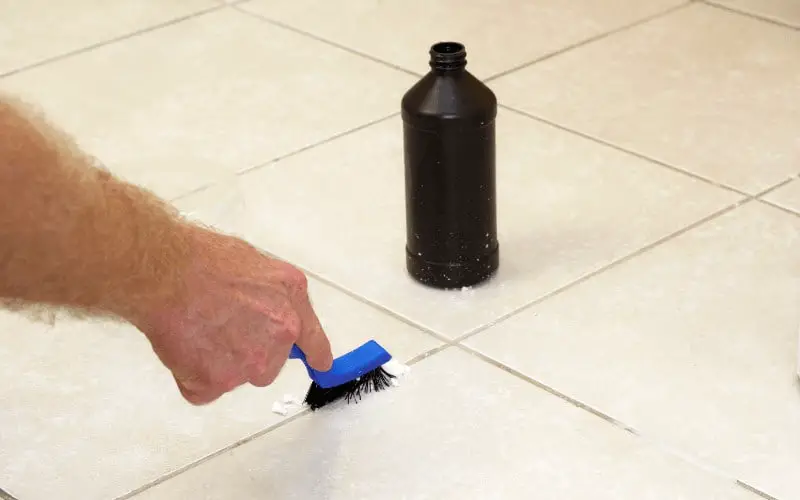
1. Clean your grout thoroughly
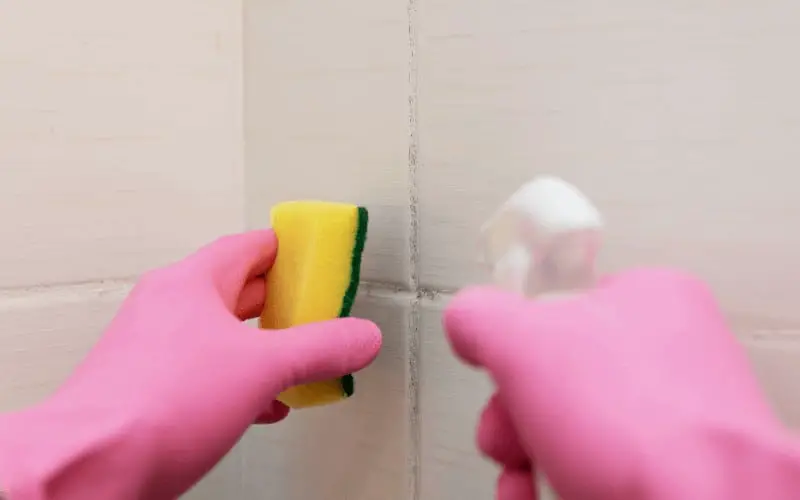
Bring out your cleaning types of equipment because before you can commence staining your grout, you have to give it a deep cleaning. Use water mixed with bleach to scrub the grout to eradicate any mildew or mustiness that might result in problems.
Though it might be uneasy, please make use of a wet sponge or brushing scrub to clean your grout and tile, even though it is on the floor. You cannot apply the grout stain you intend to apply to the wet grout, so wait for less than an hour after cleaning to start the application method.
Read: Can vinegar ruin grout
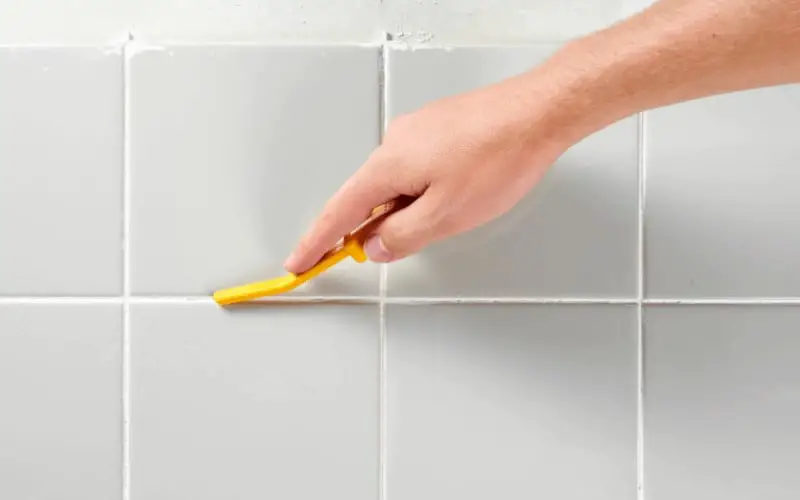
2. Apply the grout stain
Several grout staining types of equipment come along with a portable applicator brush, but use a relatively small hard brush for application if yours does not. Drench the brush into the grout stain, and cautiously stain it onto only the grout.
3. Wipe off any stain on the tile
The stain is lasting and cannot be wiped out from your tile after it dries, so be meticulous to paint in the lines and clean up any color on the tile.
Wipe off any coloring that gets onto the tile tops as soon as instructed. Some products can be brushed off the tile as long as two hours later with a nylon-faced sponge if the tile is well-glazed. Obey the manufacturer’s instructions carefully.
4. Add additional coats
This method depends on the color you are going for; you may need to put in more than one coat of grout tinge. Then, wait for 24 hours or more than that for the first coating to dry, and then carefully stain the second coat of grout color. Again, be meticulous not to casually get any stain on the tiles as it is tough to wipe out.
5. Seal your tile’s grout
Most grout is a mixture of cement and adhesive, but naturally, you will need to attach a special oil-based sealant to end your grout. This method is particularly essential for rooms that come into regular contact with water, such as the bathroom or close to a kitchen sink.
Read: Difference between sanded and unsanded grout
Adhere to the recommendations that accompany your selection of sealant as you color the grout. The sealer will make the grout look darker and shiny. Then allow the grout to dry.
Changing Grout Color by Replacing the Existing Grout
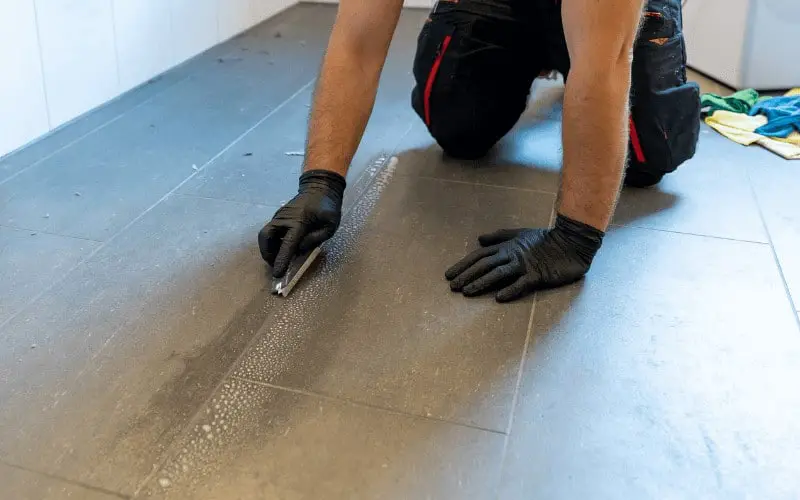
1. Take out the old grout and remove grout particles
Remove the old grout with equipment like an electric multi-tool matched with a tile blade or a manual grout saw. Make use of a little flat-blade screwdriver and a Stanley knife to clear the tile edges and get into tight spaces.
Be certain that the tiles are securely bound to the underlayer. Hit the tiles with the plastic bottom of a screwdriver.
If there is a hollow sound contradicted to most of the tile, that tile should be removed and replaced. Moving tiles are always the reason for deteriorating grout, and regrouting will not resolve the issue.
Also, discard the grout particles from between the tiles, utilizing a shop vacuum with a horizontal nozzle attachment.
2. Select a new grout
Select a new grout that is applicable for the tile installation. Generally, unsanded grout is used for grout joints under 1/8-inch wide, while sanded grout is used for joints 1/8-inch wide or wider.
3. Put in pigment to the grout mix
Add the pigment to the grout combination, if wished-for. Grout shows up in a relatively wide range of factory-mixed colors, but you can produce a fashion color with powdered grout pigment or liquid grout stain.
4. Mix and apply the grout
Stir up and apply the grout, heeding to the manufacturer’s instructions. Fill up the joints, remove the residue, and clean up the tile tops.
5. Seal the grout
Close up the grout by using a sealant if wished-for, after it has fully been fixed. The sealer enables you to preserve the grout from dirt and blemish, but it can prevent you from altering the grout’s color again. Be informed that sealant slightly blackens grout and puts on it a shiny color.
How to Clean the Grout Without Scrubbing
Tile has the nature of resisting dirt and stains but grout being spongy absorbs slime and spills. Absorption of dirt makes the grout dirty and devalues the overall look of your kitchen or bathroom.
Grouting between tiles gives an impressive, lasting, and potent effect that several homeowners prefer. However, cleaning grout when it is musty, dirty, or stained is significant discomfort.
Many of us are always getting down on our hands and knees to scrub away the grout to make it look glossy and fresh again. This effort is not the sole or the best means to get your grout nice and neat.
However, there is no way to make your grout perfectly cleaned without doing a little scrubbing.
The secret to how to clean floor grout without scrubbing is the cleaning agents. Different DIY cleansers work satisfactorily for various chores, grout kinds, and stains. Because grout is a sand-like mixture, it is very accessible to stains, mildew, and slime.
Here are some of the adequate and most effective methods to clean floor grout with the least scrubbing struggle. Attempt one of our tile grout cleaner mixtures to know if it serves you well. If not, attempt another recipe. Below are various options from which you can choose to clean your grout.
1. Vinegar and baking soda mixture
The strong effects of combining vinegar and baking soda can be used to burnish and take away stains from grout lines.
Ingredients for vinegar and baking soda mix
- One and half of cup baking soda
- Three and a half cups hot water
- One -third of a cup lemon juice
- Spray bottle
- One-sixth of a cup white vinegar
For this tile cleaner, combine the lemon juice, white vinegar, warm water, baking soda together in a spray bottle, and sprinkle the solution onto the dirty grout. Allow the mixture to sit on the grout for an hour or more than that.
Scrub the grout softly afterward because you do not need many struggles to clean the grout, and most dirt and grime would clean away. This option is the simplest way to wipe out dirt from a tile’s grout.
Vinegar is not the most powerful home cleaner usable, but it is valid and very gentle, and very cheap. While you do not want to try vinegar on natural stone tiles, ceramic tile and most other floor tiles are safe.
Prepare a larger batch of the mixture of vinegar and baking soda for cleaning vinyl siding without scrubbing. A garden sprayer can help to do good for application. You can use the usage of the garden hose can be used for rinsing.
2. Peroxide and Baking Soda
This selection is the surest and inexpensive way to let your grout get cleaned. Everything you require is some peroxide and baking soda available in your kitchen to get the cleaning accomplished.
Here are the ingredients for the cleaning solution:
- One cup of baking soda
- One cup of peroxide
Everything you are required to do is stir up the baking soda and peroxide together in a container, and if you like, put the mixture in a spray bottle to spray it on your grouts or pour it directly.
Allow the mixture to stay for about ten to fifteen minutes, and then you can begin to scrub the grout using either a little brush or a toothbrush. You will be amazed by how simple it is to clean your grout with the least scrubbing effort.
Peroxide works as an active oxidizing agent with a potent disinfectant possession, and mixing it with a baking soda, which has an alkali property, can allow grime and grease to erase effectively its own.
That is why, while allowing the mixture to stay on the grouts, you will notice that the foaming will take place; it is the chemical reaction between the dirt and the combination.
In some cases, you might want to increase the peroxide quantity and baking soda if the dirt in the grouts is still tough to be wiped out. You might need to repeat the method once again before everything is thoroughly refined and shined.
3. Oxygen bleach
You can also engage the use of oxygen bleach in the procedure of getting rid of grime in your tile grout. This option is a non-toxic means of getting rid of the dirt on your tile grout, it needs no scrubbing, and it is effectively comfortable to use.
This functions by discarding all forms of stain from oil, food stain, and or regular dirt; the oxygen ions readily attack all kinds of the stain molecules by breaking them down away in pieces and can be effortlessly rinsed away in the process. It succeeds with minor stress and grants safety.
Ingredients
- Warm water
- Oxygen bleach
To achieve this effort, blend high-quality oxygen bleach with warm water and start to stir the mixture up until it blends or completely melts into the water. You can then pour the mixture into the tile floor’s surface to flow around the grout lines with the solution.
You are to allow the surface of the tile grout dry totally before applying the cleaning mixture so that the solution can swiftly get absorbed into the grout lines.
Allow the solution to sit on the grout lines’ surface for a duration not less than fifteen minutes; if the grout absorbs all the solution, put in additional solution to the body by ensuring that there is always a lot of the cleaning solution on the grout.
The more extended period you allow the solution to drench into the grout, the lesser the effort you will have to do during the cleaning method. The solution persists in attacking all filth on the grout texture as extended as you permit it to stay on the tile.
The favorable thing is that even after washing off the soaked in oxygen mixture, work on the grout lines to produce a satisfactory result; this solution elapses its working period after six hours.
Series of dirt and spills can conjure up to make the grout change color and appearance; however, this will not be an issue for the solution to clear the dirt off. It is sure to say the oxygen bleach is a standard grout cleanser.
4. Alkaline Cleaners
Alkaline cleaners generally involve manufacturer-formulated cleaning solvents specially made for cleaning the grout of decay and mustiness. Each cleanser sold for bathroom grout cleaning is adequate for this purpose.
For chemical cleaning products, the cleaning technique differs depending on the product, so you have to always full to the manufacturer’s saturating and procedure instructions put out on the bottle.
Depending on the product, alkaline cleansers can also be risky for human health, so be safe to obey all physical safety instructions before making use of these alkaline cleaners.
Always use proper precautions with cleaners of any type, regardless of whether you prepared it yourself or not. It is also reasonable to have a scrubber on hand like an old toothbrush, bristle brush, brush scrub, or a specially-produced grout brush.
5. Baking soda and water
Ingredients
- Two cups of water
- Two cups of baking soda
- Nylon brush
For stains that are difficult to remove, create a mixture of two cups of water and baking soda. Apply it on the grout’s stain, let it sit overnight, and wipe out the dirty surface with a nylon brush. Finish up it with rinsing the surface with hot water.