Dry mopping, as well as wet mopping, is an essential home activity and this can’t be overlooked in any household. They have their advantages and disadvantages. It is important to know these characteristics before venturing into cleaning your home. In this article, we will talk about the differences between dry mopping and wet mopping, what is dry mopping, what is wet mopping, and the pros and cons of each of them
What is a Mop?
Table of Contents
- 1 What is a Mop?
- 2 What is Dry Mopping?
- 3 How to Dry Mop a Floor
- 4 What is Wet Mopping?
- 5 How to Wet Mop a Floor
- 6 Prepare The Area To Be Mopped
- 7 Dust Mop The Area
- 8 Wet Mop The Area
- 9 Clean Up The Mop And Container
- 10 Pros And Cons Of Dry Mopping
- 11 Pros of Dry Mopping
- 12 Cons of Dry Mopping
- 13 Pros and Cons of Wet Mopping
- 14 Pros of Wet Mopping
- 15 Cons of Wet Mopping
- 16 Mistakes Done When Mopping a Floor
- 17 Not Vacuuming Before Mopping
- 18 Soaking Your Floors
- 19 Not Washing The Mop Pad After Use
- 20 Wet Mopping An Unsealed Wooden Floor
- 21 Using Cleaning Solution In A Steam Mop
- 22 Mopping With Warm Water
- 23 Not Refilling The Bucket
- 24 Mopping In Swirls
- 25 Not Following The Correct Dilution Ratios
- 26 Manually Drying Floors Too Quickly
- 27 Conclusion
A mop is a piece of cloth, sponge, or other absorbent material used for the main purpose of cleaning, it is attached to a pole or stick. While it’s most times soaked up in liquid, It is used for cleaning floors and other surfaces, to mop up dust, or for other cleaning purposes.
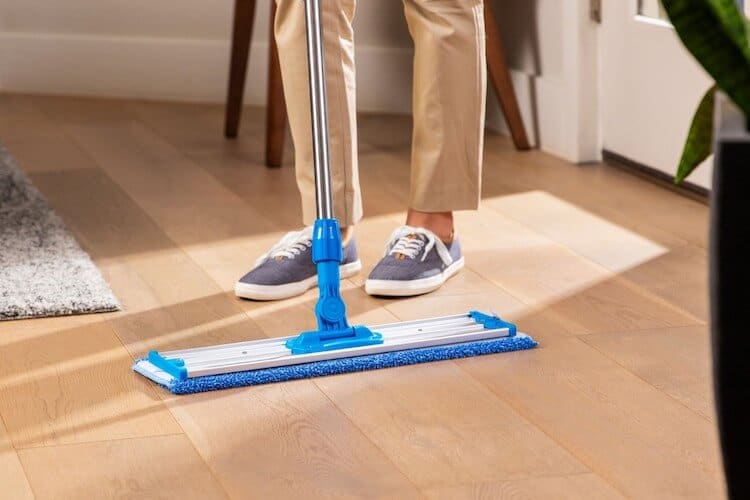
What is Dry Mopping?
Dry mopping is similar to sweeping the floor than to actually mopping it. Dry mopping entails using a dry mop on floors to remove dust, dirt, food debris, soil, most viruses, and bacteria. It is 25% faster than wet mopping. For people that have hardwood floors, dry mopping is a better choice than wet mopping because water can damage hardwood floors.
Water can cause hardwood floors to warp and twist. It is very important to inspect your floor and test if the seal or finish is intact. Place a drop of water on an inconspicuous part of the floor. If the water remains there, that means the hardwood floor is sealed. But if the water gets absorbed into the floor and creates a spot, this means that the finish/seal of the hardwood floor is broken, old or damaged; so you should avoid wet mopping such floor.
Dry mops remove dust from non-carpeted floor surfaces and hard-to-reach overhead surfaces like hanging light fixtures and ceiling beams. When used well, a dry mop restores the brilliance of hardwood floors’ surface.
Dry mops, often called dust mops, typically have a microfiber head or fabric cloth attached to a handle. The fibers of the mop head tend to be softer than that of a wet mop, and they are better suited to pick up dust from dry surfaces. The microfiber head or fabric cloth collects and traps dirt swept across the floor.
While regular brooms just sweep debris around, microfiber pads will pick dirt up, hence, preventing dirt from spreading or cross-contaminating another part of the floor. This is possible because of the intelligent design of the microfiber pads which are actually doing the cleaning.
Microfiber is made from tiny synthetic fibers that are very absorbent. The tiny synthetic fibers can store a bunch of particles between themselves because they are very minuscule and tightly packed. This is the major advantage of microfiber mops over cotton mops.
To get the best result from dry mopping, ensure that the head of the mop remains in contact with the floor always. The head of the mop should only be lifted when you want to dispose of the gathered dirt. When you are dry mopping, follow a consistent pattern and move towards the door. This makes sure the floor is clean and you mop as you leave the room.
How to Dry Mop a Floor
- Start at a corner of your room. Drag the dry mop or dust mop towards you and then push it away; work in straight lines while keeping the head of the mop in contact with the floor.
- Move the mop sideways to the edge of the room and continue the back and forth movement. Don’t bother applying pressure on the mop; the friction of the head of the mop against the floor will do the work of cleaning.
- Check the head of the dry mop for gathered dust, dirt and lint. Remove any surface debris from the head of the mop with your fingers, and then take a few steps back.
- Place the mop in front of where you were standing before you moved a few steps back. Continue the back and forth movements of the mop as you work your way back across the floor and sweep dust off a section of your floor parallel to the previous section you worked on.
- Continue dry mopping the floor in slightly overlapping sections until the floor has been swept completely. Check the head of the dry mop and clean it every time you reach the edge of the floor. Do this more often if signs of plenty soil/dirt are shown.
- Rinse the head of the dry mop thoroughly if it is the reusable type (typically made of woven cloth) and hang it up to air dry. If the head of the dry mop is disposable (normally made of microfiber), peel it off the mop and dump it.
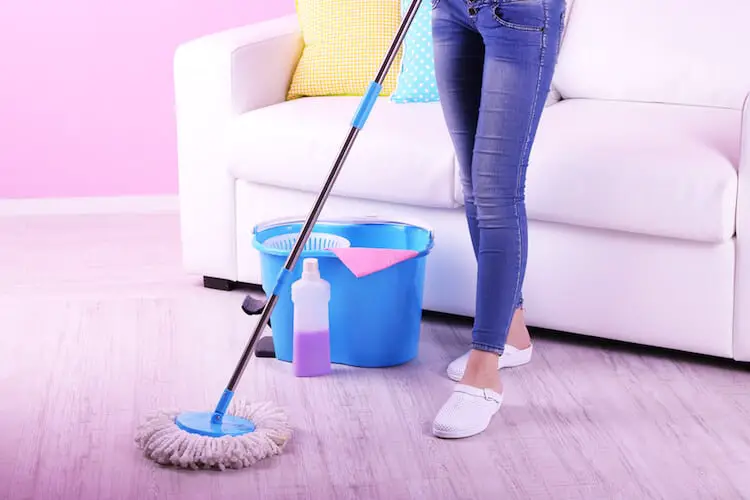
What is Wet Mopping?
Wet mopping entails using a damp microfiber cloth to clean a surface, most times floors. Compared to other materials, a damp microfiber cloth is a very efficient cleaning tool.
When you use the damp mop correctly, it will clean up stains, dirt and spills quickly. To increase the effectiveness of the damp mop base while wet mopping, you can apply cleaning chemicals and reagent as recommended.
The methods of wet mopping vary and depend on the type of floor you have at home. If you have a hardwood floor at home, you have to leave the surface of the floor completely dry after you have wet mopped. This implies that you will have to use a dry towel or cloth to dry out any pool of water left on the floor after wet mopping. This single action protects the finish of the hardwood floor and also the hardwood itself.
For wet mopping, microfiber mops are not the only option to use. There are various kinds of mops you can use; each of them is just as impressive as the other. You can use spin mops, sponge mops, traditional mops or a rag fixed to the head of a mop. Furthermore, you can decide to go for advanced options that come fully with a nipped water field or a reservoir that makes the task of mopping less difficult and more productive.
How to Wet Mop a Floor
Prepare The Area To Be Mopped
Set up the appropriate caution/wet floor signs to make other people in the room know that where you are working on might be slippery, so they should move carefully or avoid the area. Remove all obstructions including furniture and tables to a safe area where they will not get damaged with water and can be easily placed back in their initial position. Remove any sticky substances alongside larger debris from the surface of the area to be wet mopped.
Dust Mop The Area
Remove all dirt, debris and large objects like dust bunnies, pallet chips, and littered food items from the area to be wet mopped.
Wet Mop The Area
Dip a mop into the desired solution in a container and wring the mop out till it is just moist. A major problem that comes up in this method of mopping is over-wetting the surface of the area. Making use of moist mop will let the dirt on the area cling to the mop as you move it instead if the dirt being spread around by the water on the floor surface.
Start mopping in the corner of your room that is the farthest away from your door. Mop the area in a figure-eight pattern to use the mop most efficiently. As you proceed, move the mop towards the entrance of your room so that you are always stepping only on a dry area of the floor.
This will ensure that streaking and tracking of your solution to other parts of the area is prevented. Change the solution you are using as and when due so that the solution is not too saturated with dirt. A solution that is too saturated with dirt won’t remove dirt from the floor; it will just move dirt from one part of the floor to another part of the floor.
Ensure that the solution you are using is mixed and diluted per the manufacturer’s recommendation or instruction. After mopping, you can then use an air mover to quickly dry out the floor if the area is needed immediately.
Clean Up The Mop And Container
Empty the container holding the dirty solution. Rinse the container thoroughly; it is not safe to have a residue of the solution in the container when next you want to use it. Rinse the mop completely and place it in an appropriate place to get dry. Then remove all the caution signs you set up at the beginning. Finally, move all items or objects back to their initial position.
Pros And Cons Of Dry Mopping
Pros of Dry Mopping
Dry mopping has many advantages when done at the appropriate time. One main advantage is its convenience and ease of operation. To proceed with dry mopping you just need a clean and dry microfiber cloth on the mop head. In dry mopping you don’t make use of any chemical or cleaning detergent; this can prolong the life of your floor’s finishing. Dry mops are very cheap and cost-efficient.
When you are purchasing a dry mop, choose one with a replaceable mop pad. Some manufacturers sell replaceable/disposable mop heads for dry mopping. When the mop gets dirty while you are using it, just remove the disposable dry mop head and dispose it off instead of going outside to shake the mop to release dust.
Removable microfiber heads can be washed when they are dirty and can be replaced when they are worn out. This makes sure that you begin each dry mopping section with a clean mop head and the amount of dust released back into the air is limited, hence, dust settling back on household items and/or allergy issues coming up is prevented. Alternatively, you can make a reusable mop pad in your home. So, dry mopping is extremely cost-effective while cleaning your floor.
Cons of Dry Mopping
Although dry mopping has advantages, it also has downsides. For example, it does not effectively cater for liquid spills and stains. In cases of liquid spills and stains, you will need a damp mop to get rid of them.
Pros and Cons of Wet Mopping
Pros of Wet Mopping
Provided you have an appropriate cleaning mixture or solution, wet mopping can clean almost any type of stain. If you are meticulous about having a clean floor all the time, wet mopping will make sure your floor is neat every time. Wet mopping is the best method of cleaning floors even though it consumes time. Apart from leaving the floor sparkling, wet mopping helps to eliminate bacteria with the application of disinfectants and cleaning solutions.
Cons of Wet Mopping
Wet mopping is expensive because you have to buy more cleaning solutions and tools. However, you don’t have to wet mop your floor daily, so the initial cost of getting tools and cleaning solutions should not be of much concern. Another disadvantage of wet mopping is that it takes more time to be completed. It is not advisable to wet mop your floor daily except you have pets or children in your home.
Mistakes Done When Mopping a Floor
There are some mistakes common to mopping of floors, they are listed below with how to avoid them.
Not Vacuuming Before Mopping
Although vacuuming before you mop your floor seems like double work, the result is a more effective clean. Having loose debris on your floor may cause scratches on the floor as your mop drags it across. Having loose debris on the floor also means you might leave dirt behind you and you still have more scrubbing to do later on; the double task you tried to avoid.
It’s advisable to avoid sweeping your floor with a broom. This is due to dust particles becoming airborne and spreading around the room to cause allergic reactions.
The powerful suction of a vacuum is the only thing you need to capture all of the dirt before mopping. The vacuum will remove grime from corners of your room, beneath part of your furniture and around other objects easily. If you’ve got hardwood floors, it will be best to make use of a canister vacuum to prevent unnecessary damage.
Soaking Your Floors
It can be tempting to dip your mop in your bucket and transfer the moisture to your floor. It might look like you can clean more surface area faster this way and get rid of stubborn dirt.
However, the issue is, soaking your floor might leave streaks. It might also take a long time to dry and become a hazard in your home. Also, you may claim that your hardwood floor is waterproof; using too much water all the time could still risk penetrating the seal/finish. You certainly don’t want to damage your floor or dull the finish. Damp mopping may be the best way to remove stains, marks, and dirt; you should look out for a mopping bucket having a spin or wringer to make the job easier.
Not Washing The Mop Pad After Use
Many people get lazy and think you don’t need to change the mop pad after every cleaning session. Don’t ignore the little dust on the pad because the general rule is that you can’t clean a dirty floor with a dirty mop pad. So, you have to wash the mop pad well after every use to ensure its cleanliness too. If you’ve got disposable mop pads, simply detach it and throw it in the trash after only one use.
If you’ve got reusable a microfiber mop head, put it in your washing machine. Even if they’re cleaning cloths, it’s appropriate to wash them separately, away from cotton or synthetic products. This is because cotton and synthetic products naturally ‘shed’ fiber when washed. These fibers would then settle on the microfiber cloths.
This will get the mop pads dirty instead of being ready for the next cleaning session. Also, try not to overfill the wash load in the washing machine. You might want it all done at once, but this can prevent effective circulation during the washing process. Simply put, your mop pads won’t be thoroughly cleaned. So, leave ample space at the top of the wash load to facilitate effective cleaning.
Wet Mopping An Unsealed Wooden Floor
Unsealed wooden floors and water are great enemies. You should only clean linoleum, tiles and other sealed surfaces with a wet mop. Water can distort and warp wood. This can happen if your wood is not sealed or if you break down the seal little by little, over time with excess moisture.
Also, moisture can facilitate mildew and mold’s growth on wood, resulting in discolored patches. This can worsen allergies and make you fall sick. If you have wooden floors, you should consider only dry buffing with a microfiber mop. So, it’s best to not make use of steam mops and anything with water to prolong the lifespan of wooden floor.
Using Cleaning Solution In A Steam Mop
Filling up the water tank in a steam mop with a cleaning solution is harmful. It can damage your mop and your flooring as well. The amazing thing about steam mops is that they don’t need any chemicals to kill bacteria. The steam (heated already) does this all on its own, gets rid of A. baumannii, MRSA and VRE. So, fill the water tank of your steam mop with demineralized or distilled water only. This makes sure that the build-up of calcium is prevented. Hard water usually constitutes minerals that can block your steam mop and also the nozzles that emit the steam.
Mopping With Warm Water
When some people wet mop, they fill their bucket up with warm water. Don’t forget that hot water evaporates faster than cold water. So if you use warm water, you may be left with more soap residue on your floor than you expected. This might make your floor sticky and streaky. Therefore, it is better to use cold water when mopping your floor or other surfaces.
Not Refilling The Bucket
Cleaning your floor with dirty water simply means you’re spreading the contaminants around your flooring. When the water starts looking murky and changes color, it’s time to pour it out and introduce fresh and clean water.
The number of times you’ve to refill the bucket with fresh water will vary. If you’ve got a heavily soiled floor, you might have to empty and refill the bucket a few times. Just make sure you pay attention to the water and know when it is due to be replaced. Some mopping buckets usually have a drainage plug to make it easier to be emptied.
Mopping In Swirls
Mopping shouldn’t just be done anyhow, it should follow a technique. It may be tempting to move the mop in a zigzag pattern or mop in swirls, using more water in the same part of the floor. This causes residue of stubborn streaks.
Also, you won’t know where you’ve cleaned already and can end up doing double work. Start mopping at the farthest corner from the door of the room. Move the mop in straight lines and don’t oversaturate the floor with water. This is the proper way to do it so that you don’t stand any wet mopped part and make it dirty again.
Not Following The Correct Dilution Ratios
Some people wrongly believe that the more cleaning solution you use, the more clean your floor will be. They go ahead to use an excess cleaning solution and make a mess of their floors. Using too much floor cleaning solution can make the floor streaky, sticky and squeaky underfoot.
In the long run, the excess cleaning solution can also destroy the brilliance of your flooring. On the other hand, your floor won’t be cleaned effectively if you don’t use enough cleaning solution. So it is best to follow the usage instructions on the product. Make sure you also check if the solution suits your type of flooring.
Manually Drying Floors Too Quickly
Some people get impatient after cleaning their floors. While you may be tempted to use a towel to quickly dry the floor, this could be a mistake. Studies show that microorganisms are killed after they’re in contact with a disinfectant for about ten minutes. While it could probably take a shorter amount of time, you don’t have to risk it. So, avoid the rush and let your floor dry out properly to make sure it’s sanitized and disinfected effectively. To help your floor dry out, you can open a window of the room to allow cross ventilation.
We’ve written a complete guide on the best steam mop for a perfect shiny floor. Check it out and make your choice based on the feature that suits your need.
Conclusion
Both of these types of mopping have their advantages and disadvantages. If you are looking to just sweep out some dirt and dust that accumulates on your floors daily, make use of a dry mop. For heavy-duty cleaning, use a damp mop. As the case may be, you can use the two methods of mopping, because you usually get both dry and wet mop pads when you buy a microfiber mop. Do your regular cleaning with a dry mop, and then every once in a while, use the wet pad to eliminate all the viruses and bacteria.
Dry mopping daily keeps dust and dirt at bay. It preserves a hardwood floor to last long and keeps shining. Wet mopping is a deep cleaning process that is usually done twice in a month or once in a month.
Now that you are well informed, adhere to all instructions on the right methods to have a brilliant and sparkling floor. Has this post been helpful to you? Do share it with your friends so they get informed on dry mopping and wet mopping.