How to remove slate tiles from wooden floor? This article will show you ten steps to remove slate tiles from wooden Floors and other important information about slate tiles.
Natural stone tiles, such as slate, are used. As a result, they outperform clay-based ceramic tiles.
Here is how to remove slate tiles from wooden floor, firstly clear the area and then remove the old grout, thereafter you dismantle and remove the tile and old adhesive the finally fix in the replacement.
Slate tile has a lot of promise. Many folks, however, desire to get rid of their slate floors. Other forms of flooring may be more sectorally appropriate in some circumstances.
You may need or need to remove slate tiles for various reasons. One of the most prevalent causes of floor damage is improper installation or the absence of a subfloor beneath the wood floor.
Related: How to Remove Slate Tile Floor
How To Remove Slate Tiles from Wooden Floor: Measures to Take
Table of Contents
- 1 How To Remove Slate Tiles from Wooden Floor: Measures to Take
- 1.1 1. Take Everything off the Wooden Floor, Including Furniture and Other Belongings
- 1.2 2. Get Rid of the Old Grout
- 1.3 3. Dismantling
- 1.4 4. Remove the Tile
- 1.5 5. Remove the Old Adhesive
- 1.6 6. Put the New Mosaic in Place
- 1.7 7. Place Your Hand on the Tile
- 1.8 8. Cleaning the Installation
- 1.9 9. Laying Tile and Grouting
- 1.10 10. Clean and Seal the Floor
- 2 Conclusion
1. Take Everything off the Wooden Floor, Including Furniture and Other Belongings
Moldings like shoe moldings, baseboards, and countertop moldings must be removed with a flat lever radical for a clean finish.
Put the rest of the molding in a different room, a parking lot, or outside. Repairing a slate roof can take some time, but it’s not complicated.
2. Get Rid of the Old Grout
With a carbide-tipped grout saw, scrape the old grout near the damaged tile in this step.
While working, take care not to chip or scratch the surrounding tile.
If required, remove all of the grout in a slow, steady manner until the side of the tile is revealed.
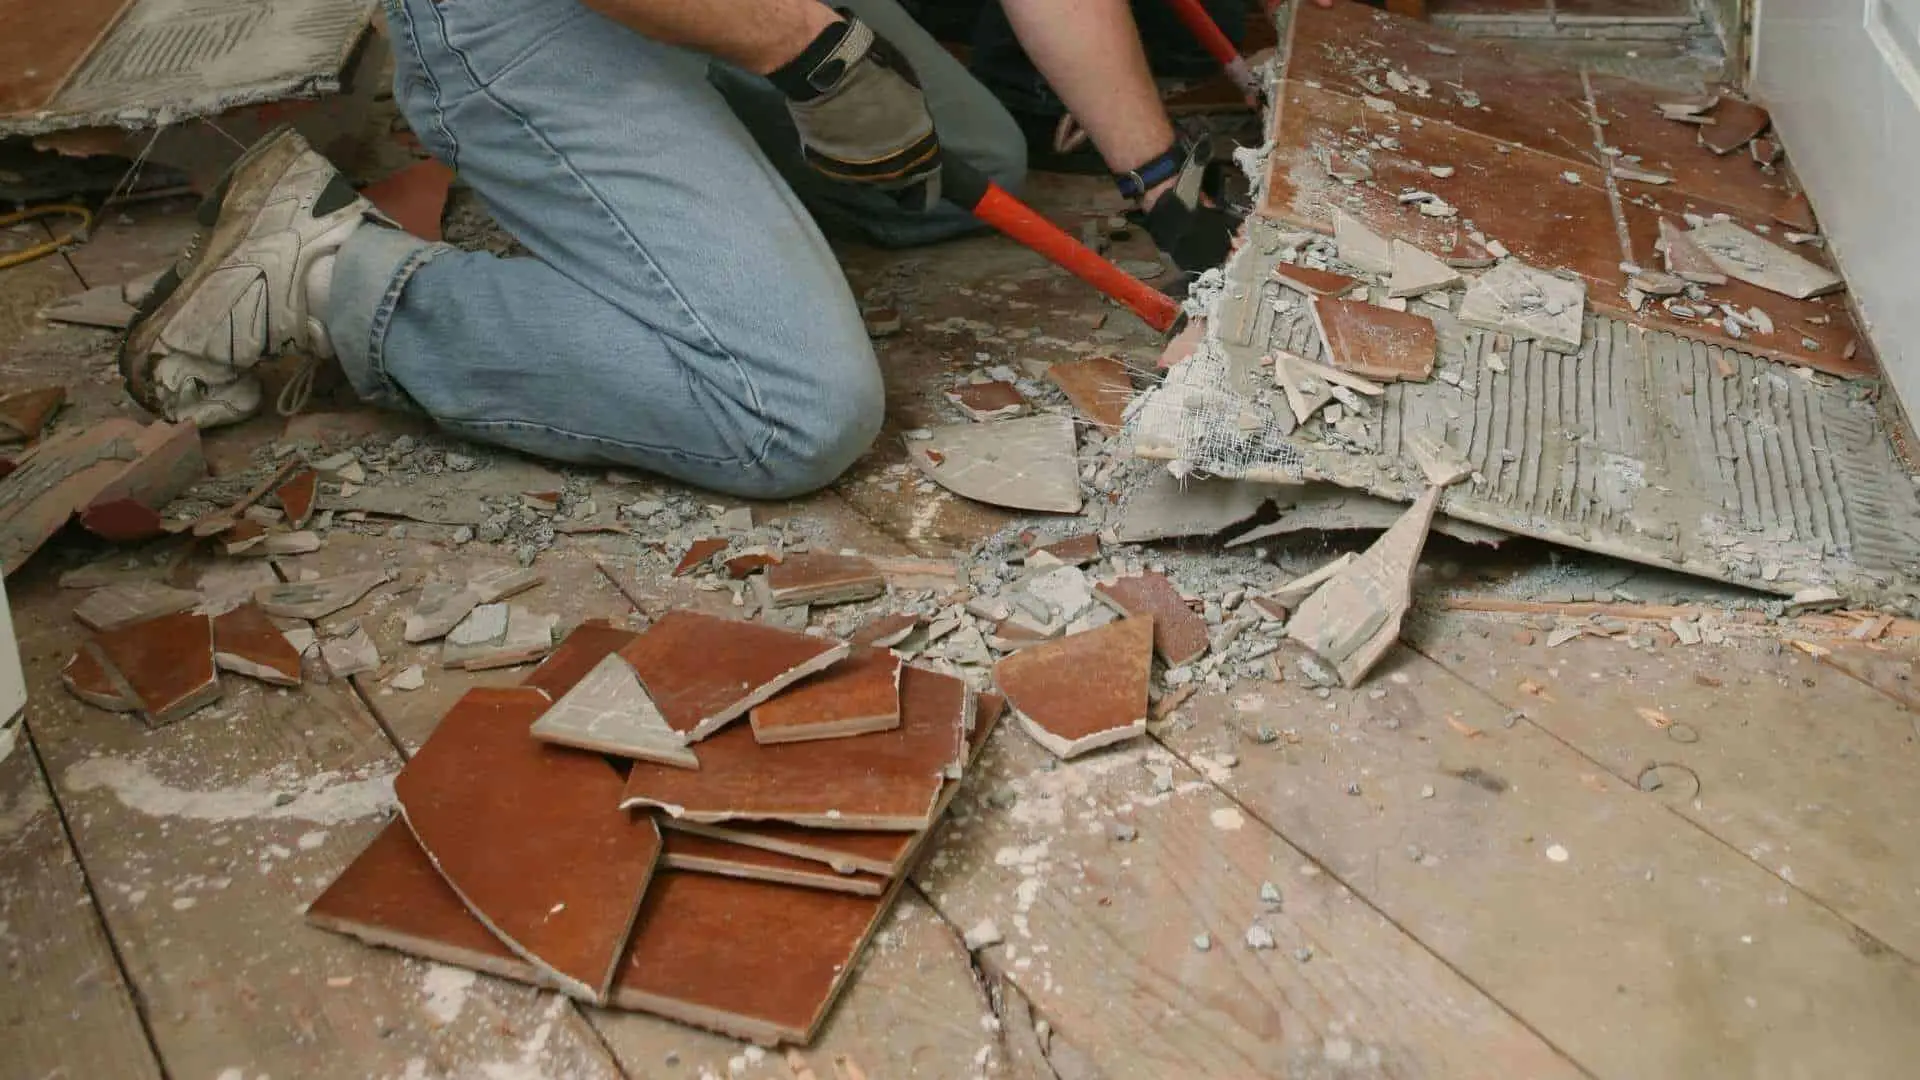
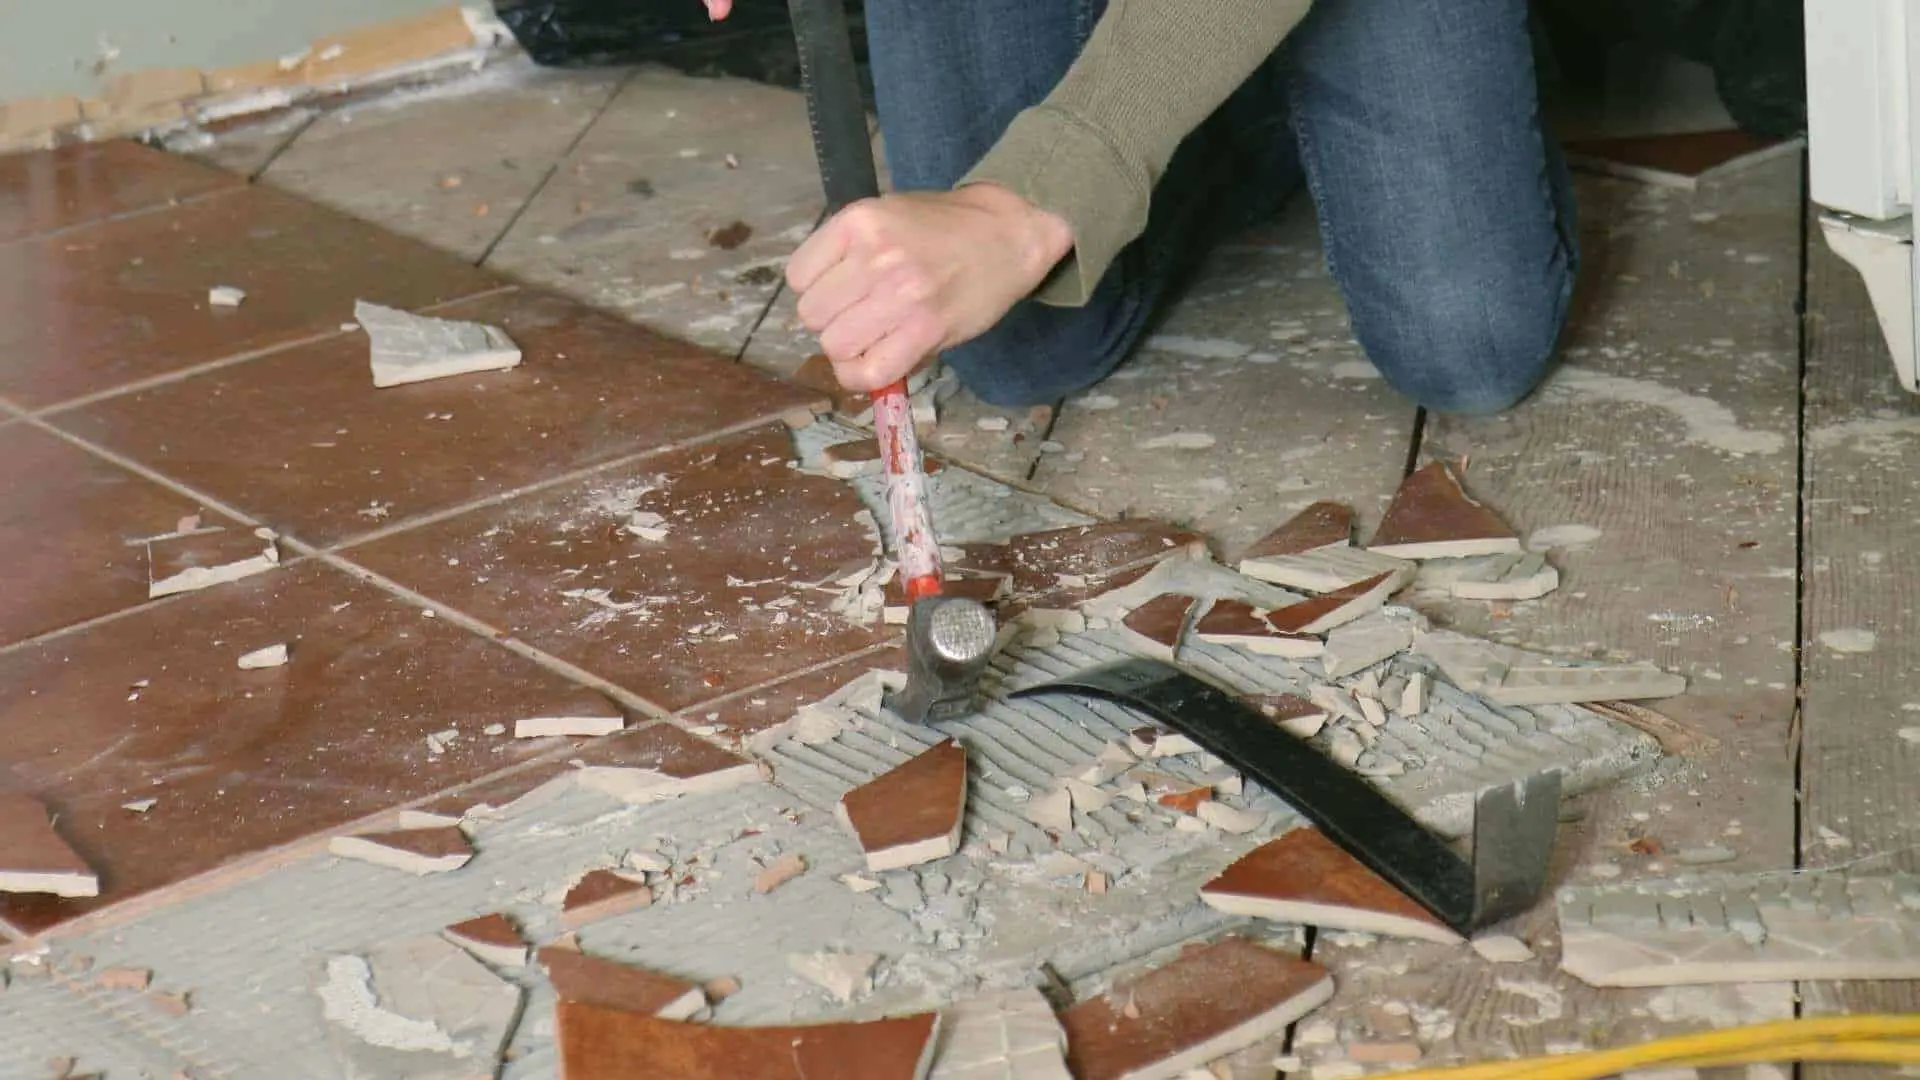
3. Dismantling
To puncture the tile, you’ll need to use a hammer to drive a set of nails into it in one or two spots.
This will cause the slate to crack, allowing you to remove it.
To protect your eyes from flying sharp stones, wear safety goggles.
4. Remove the Tile
Placing the tip of a chisel in one of the cracks will help remove slate tiles from a wooden floor. After that, use a hammer to gently tap the chisel against the tile to loosen and lift the pieces.
To prevent injuring nearby tiles, use a chisel very carefully at the tile’s edges at this stage.
Then, take care not to damage the subfloor or the new tile and mortar layers, break only the old tile and mortar layers.
5. Remove the Old Adhesive
You’ll need a spatula or a chisel to remove the old adhesive in this stage.
Remove as much adhesive as possible, then sand the area flat with bulky sandpaper to remove any remaining glue.
Finally, use a vacuum cleaner to remove all sand and dust from the floor.
6. Put the New Mosaic in Place
Stir up a small batch of adhesive mortar following the developer’s specifications. Apply mortar to the back of the tile immediately. Use a 1/4-inch notched trowel for this.
Drag the trowel’s notched edge through the mortar to make uniform ridges. Make sure the tile’s underside is completely covered.
Place the tile on the floor and press it down until the tile area matches the surrounding pieces. You can move it about in the mortar by gently rotating it back and forth.
Place a tile spacer in each of the four corners if desired to ensure that the grout lines are straight. Otherwise, eyeball it to ensure the grout line is the same width.
Read: What to Clean Slate Floors With
7. Place Your Hand on the Tile
Place a straight part of a 24 board on top of the freshly placed detail, making sure it contacts at least two adjacent tiles.
Use a mallet or hammer to gently tap the new tile into place not to disturb your neighbors. A level can also be used.
In the case of a fractured slate, the tile area may be uneven, making it difficult to make it the same level as the rest of the floor. Focus on making tile edges like this uniform with adjacent pieces during the grout line.
8. Cleaning the Installation
To remove excess adhesive from the grout lines, use a screwdriver.
Using a moist cloth, wipe away any tainted mortar from tile surfaces. Remove spacers from corners with a pair of needle-nosed pliers.
After that, you’ll have to wait for the tile to settle. This should take at least 24 hours to complete. The importance of a clean slate should not be overlooked at this time. Repairing roofing slates is simple.
9. Laying Tile and Grouting
As suggested by the developer, mix a small quantity of grout. Using a spatula, apply the grout to the grout lines close to the tile.
To drive grout into the holes, you can also use your fingertips. Using a cloth, wipe up any excess that may have fallen onto the tile.
Clean the grout lines carefully with a damp sponge to smooth the grout and clean the tile area if the grout does not give way under quick finger pressure.
In a bucket of clean water, rinse the sponge frequently. It’s okay if there’s a mist of grout on the tile. Allow the grout to completely dry before continuing.
10. Clean and Seal the Floor
Clean the entire floor area with not too hot water, making sure to remove all dirt and debris. Allow drying completely
Read: Slate Floors Cleaning Tactics
Conclusion
Interior applications for slate tiles include wooden floors, counters, walls, and even baths. Although slate lasts for centuries, it can be removed and replaced for a fresh look.
Slate removal is a challenging, time-consuming process. It’s held together with cementitious mortar, which is relatively complex, and there may be a few more layers of material to remove before you get to the original substrate.
Prying up a broken slate with its razor-sharp edges can fly microscopic particles. If you follow the steps in this article, you can navigate around to remove slate tiles from the wooden floor.
This article was written to help you understand every detail about how to remove stale tiles from wooden floor and to help you make an informed decision when faced with the choice.
We hope you found it helpful; if you did, kindly share it across your entire social media pages.