Slate tiles are made of natural stone. They are more durable than ceramic tiles made from clay and fired in a kiln. They last longer than other floorings because they are fine-grained metamorphic rocks.
They are installed the same way as other floorings, but when we talk of removing slate tile floor, we must consider that it requires much more effort.
When we talk about how to remove slate tile floor, we must follow all the due processes like firstly removing all the furniture, and the existing grout, followed by breaking all the tile using a chisel, or an electric tile stripper where necessary to prevent avoidable mistakes.
This is labor-intensive, but with the right tools –hammer, cold chisel, electric tile stripper, protective goggles, carbide-tipped grouting saw, etc.–and techniques, it can be done relatively quickly and possibly in an afternoon.
Related: 8 Simple Slate Floors Cleaning Tactics
What to Consider if You Want to Remove Slate Tile Floor
Table of Contents
When removing slate tiles, you must be careful not to damage the subfloor. Most tile installers will put screed beneath the tile to protect it. Screed, a mixture of sand and cement, creates a level bed to lay slate tiles on.
However, not all slate tiles are laid on the screen. Some are fixed directly on the subfloor, and if you do not take extra precautions during removal, it could damage the timber subfloor.
There are lots of reasons why you would decide to remove your slate tiles; it could be damaged because the tiles were not installed properly, or it could be that a subfloor was not built over the wood floor.
Whatever the reason, there are easy steps written down below that will help you remove your tiles on your own.
Read: 8 Simple Slate Floors Cleaning Tactics
How to Remove Slate Tile Floor
Step 1: Remove All Furniture and Other Items From the Slate Floor
Moldings should be removed with a flat lever radical. This instrument is necessary for a clean job.
Put all the moldings away, along with your furniture, cabinets, and all that. All these should be put preferably outside.
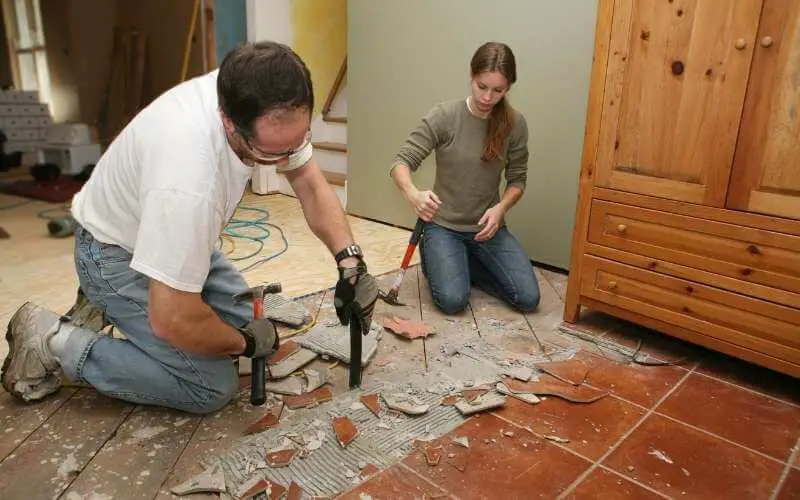
Step 2: Remove the Existing Grout
This can be done in two ways, but you should be sure not to chip or break the adjoining tile in either of the ways.
You can use a carbide-tipped grout saw to scrape the old grout near the broken tile slowly and steadily until the side of the tile is exposed completely.
You could also use a three-pound sledgehammer and a cold chisel. You place the cold chisel between two slate floor tiles on the grout line.
A cold chisel is used to remove materials without precision. Hold the chisel at a slight angle pointed toward the bottom edge of the tile and strike it with a sledgehammer.
If the grout does not budge, put a thin, flexible knife beneath the tile and pull it loose gently. And because some tiles will be more complex than others, you will be applying varying degrees of force.
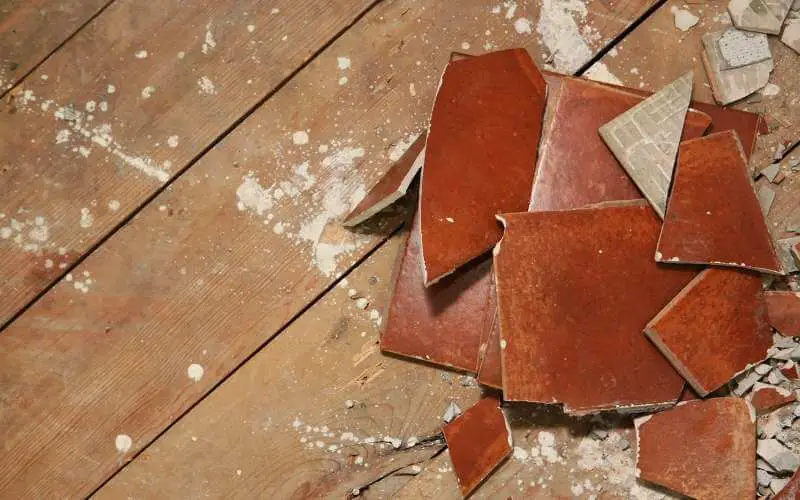
Step 3: Break the Tiles
Take a hammer and use it to drive a set of nails into several places on the tile, therefore, puncturing it. This will break the slate so it can be removed.
Endeavor wearing goggles to protect your eyes from the flying stones while doing this. Separate the slate tiles from the floor when you’re done.
Then, sweep the floor and throw the debris in a trash can. Sweeping will help you identify the problematic areas and prevent the tiny pieces from getting stuck to the bottom.
Step 4: Use a Mix of the Chisel and Your Hand in the Smaller Areas
Place the tip of the chisel against the tile adjacent to the one you just removed. Strike the chisel with a sledgehammer to remove the tile.
Then, you can use your hand to remove the tiles in smaller areas. This will create space for you to clean up and focus on the more prominent areas.
Step 5: Use an Electric Tile Stripper for the Larger Areas
You have to switch to an electric tile stripper machine for the larger areas. Plug the electric stripper into an outlet. Turn on the tile stripper.
Note that the blade of your stripper has to coincide with your subfloor material. This means that if you have a cement subfloor, face the machine’s blade towards the ceiling.
However, if it is a wooden subfloor you have, face the blade of the electric tile stripper towards the floor. Knowing this, fit the blade of an electric tile stripper against the subfloor next to the slate tile.
Ensure you push the machine across the floor and remove a small number of tiles at a time to avoid the build-up of tiles in front of the stripper along with the damage to the machine.
Step 6: Finishing Touches
Continue removing small amounts of tile and stop the machine from getting rid of the loosened tile. Do this until all the slate tiles are removed from the subfloor.
Read: What to Clean Slate Floors With
Conclusion
Follow these steps, and you can remove your slate tiles easily. It is advisable to note that slate tiles are heavy so this task would be time-consuming.
Also, it is substantial to note that removing slate tiles is expensive because the value of slate tiles is high, along with all the materials required.
However, it is worth it. If you intend on keeping your removed tiles, it is pertinent that you carry it out carefully.
As I said, the tiles are expensive, so even though you do not intend to fix them yourself but call a professional; you should handle them very well, so you do not have to buy a new set.
As a precaution, apart from goggles, ensure you wear thick gloves as these broken slate edges are as sharp as glass, and you can get cut. Now, go ahead and remove your slate tiles all on your own!
We hope you found it helpful; if you did, kindly share it across your entire social media pages.