A floor leveler is a fast and cost-effective fix when you need to repair, smooth, or raise a floor. A floor leveler is a cementitious mixture that is like concrete but flows easier and sets faster than concrete.
Depending on the type of floor leveler you make use of, it may take up to 2 hours for it to set up smooth and flat but one of the problems that most users may face is knowing how thick can a floor leveler be poured.
The recommended thickness of a floor leveler is about 0.125 to 0.25 inches according to the type of floor leveler you are making use of.
Types Of Self Leveling Concrete
There are two types of floor levelers;
Acrylic Self-Leveling Compound
This is made by mixing acrylic liquid polymer and cement powder together. It results in a floor that has a bit of elasticity (for concrete) and is also resistant to scratches and abrasions. They take a longer time to dry compared to the other type of self-leveling concrete.
Water-Based Self-Leveling Compound
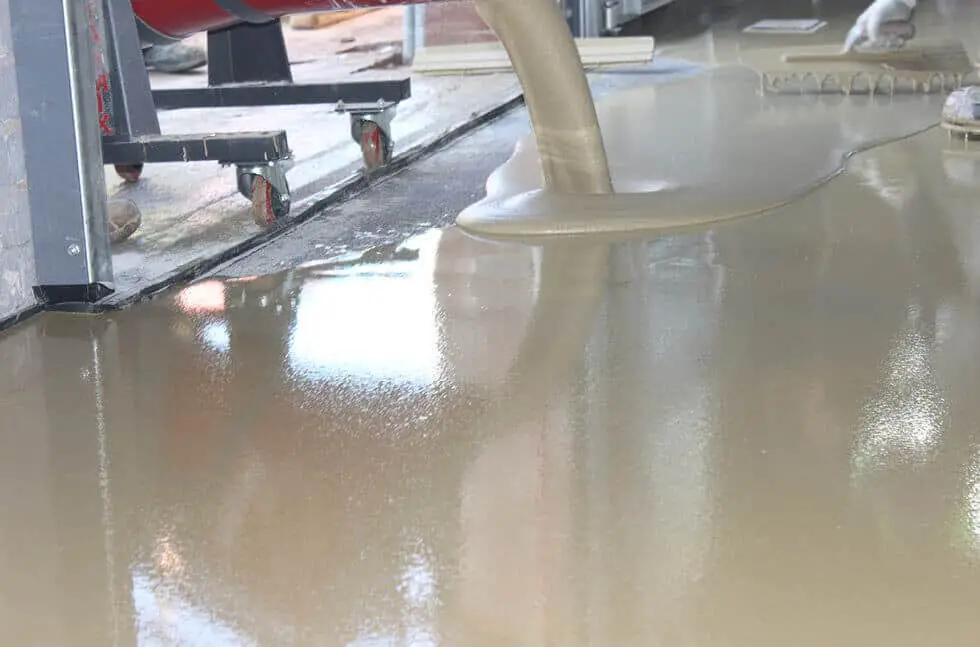
This type of floor leveler uses water as its lubricant, and this results in a surface that has a concrete-like consistency. It has a short drying time and can dry in as little as 20 minutes. They are usually available in powder form which is mixed in water to create the concrete.
How to Pour a Floor Leveler

The following guidelines will help to prevent issues that tend to arise with self-leveling underlayment installation.
Select a Suitable Product
The strength level of the floor leveler product you will need depends on the flooring it is intended for. A commercial floor that will be subjected to heavy traffic and rolling loads will require a higher-grade floor leveler than a floor in a single-family home.
You also need to understand your project timeline and opt for a product that fits within the appropriate schedule.
Some products need to be installed for at least 24-48 hours before the floor covering is installed while some products are able to accept moisture-sensitive floor covering after 12 to 16 hours.
You should consult the package instructions for information on the product’s tensile strength, compressive strength, and flexural strength, as well as the recommended cure times.
There are basically two types of floor leveler underlayments which are traditional and next-generation technologies. The only significant difference between the two types of levelers is the flowability and the smooth surface profile achieved by each product.
Some installers prefer the features of traditional levelers due to their working properties while Others prefer the new technology because of its high flow properties and extended working time.
The type of floor it is installed over and its intended use will determine the best product technology you should opt for. Traditional levelers are the right option for deep fill applications that is greater than 3/16” while newer technologies are best suited for thinner applications.
Know your Substrate
Most levelers require that the surface it is installed over is fully stable and structurally sound before application. Also, to choose the right primer, you have to understand your existing substrate porosity. You can carryout A simple water droplet test to determine the surface porosity.
It is also important to know the make-up of the existing substrate. Because a sealed concrete requires only a single coat of primer while Unsealed concrete may require multiple coats of primer before the application of a cement-based levelers.
Prepare your Substrate
Before applying the leveler, make sure that all floor openings, gaps and cracks have been plugged and also install termination dams to prevent any seepage.
To determine moisture limitations of floor covering, adhesives and floor leveler ensure to consult with product manufacturers in order to determine if moisture mitigation is required. If it is required, it has to be done before the installation of the floor leveler.
Floor levelers also require the use of a primer before installation. Skipping the use of the recommended primer may result in installation failure. Applying a Primer before installing a floor leveler helps to retains the moisture within the leveler underlayment and enable proper curing.
A primer also acts as a bonding agent that ensures that the leveler bonds properly to the substrate. For information on how how to properly dilute and apply the primer you Refer to the primer’s package label.
Aside from primer, most levelers also require that the substrate is clean and free from any contaminants that may impend the bonding process, this includes adhesive residue, oil, loose or peeling paint, sealers/curing compounds, grease, and other contaminants.
A Polished underlayments will require an epoxy primersor a specific Concrete Surface Profile (CSP), and for this case, mechanical abrasion (shot-blasting), is required.
Read: How hard is it to epoxy a garage floor
Proper Water Demand
Properly Mix the floor leveler using the amount of water specified on the package label. You need to make floor leveler isn’t over diluted as this can weaken the strength of the underlayment and may cause cracking.
Overwatering the leveler can also cause a white film to form on the surface of the cured underlayment. Mixing your floor leveler improperly can make it difficult to work with and lead to improper flow, uneven application and cracking.
Mix only two bags of leveler at a time for optimum efficiency during the application process. Also, some floor levelers can be pumped, so If you got a product that requires pumping, special attention is required in order to maintain proper water ratios and also prevent overwatering.
However, make sure to Follow the equipment and product manufacturer’s recommendations before carrying out the application process.
Temperature Level
The temperature of the room the leveler is being applied has an effect on the product, a climate too cold can increasing the set time of the product which a hot climate reduces it. You need to Make sure that the temperature of the room is within the manufacturer’s recommended range.
The Temperature and humidity of the room affects the flow, working time and set time of the leveler.
Aside from the temperature of the room, the temperature of the powder and the water is crucial. Do not Leave the product in the sun, or in a hot environment as this may cause it set very quickly.
If the use of a warm product is unavoidable you can mix it with cold water to help combat installation issues. When working in hot conditions, you can place blocked or bagged ice inside the water barrel To maintain the cold water temperatures.
Regardless of the weather temperature, making sure to acclimate the product before mixing and application is the right way to go.
Follow the Manufacturer’s Recommendation
Many products come with a specified maximum thickness from their manufacturers. For some products, you can add aggregate (pea gravel) in order to increase the depth of the pour, and some only allow their product to be used neat.
When making use of aggregate, make sure to use the appropriate size and amount when extending a floor leveler underlayment in a single pour.
In the absence of aggregate you can apply two separate pours or multiple lifts to achieve the same thickness you would get with the use of aggregate.
Once the first application of the leveler becomes a walkable surface, you can then apply the proper primer coat before applying the additional pour or lift.
If you have extremely uneven surface in isolated areas with depressions that is greater than ½” deep, you can treat those areas before applying the final pour. This ensures that a consistent amount of floor leveler is used throughout the application.
To determine the most suitable product for your application make sure to Always consult with manufacturers.
Read: How to install hardwood on concrete
Protect your Freshly Poured Underlayment
During the initial curing process of a newly applied floor leveler, which takes about 2-6 hours, it should be protected from direct air movement (drafts) as they may cause the leveler to cure prematurely which leads to cracking.
Most floor levelers are not the final floor surface the installer is opting for, there’s usually another floor covering installed over the leveler, but before any heavy construction is carried out on the floor, it should be allowed to cure completely which takes 2-24 hours.
Read: Disadvantages of epoxy flooring
Allowing the leveler to cure completely will help to prevent any surface damage as allowing Traffic without protection can cause gouging and irregular surfaces before the installation of the floor covering installation.
To ensure a successful floor leveler application you need to note and adhere to the manufacturer’s instructions. You also need to ensure you read labels and product data sheets carefully before carrying out the application process in order to ensure that the products perform as desired.
Read: How to remove rust stain from concrete
Conclusion
A floor leveler is used to flatten existing hard floors, like concrete, tile, and plywood, before a new floor such as tiles, vinyl, or wood is installed in the home.
Aside from other installation problems you may face, knowing how thick can a floor leveler be poured is one of the most crucial ones, as the thickness of a floor leveler has an impact on the overall turnout of the floor installed over it.