There are different DIY epoxy garage floor kits all over the internet and home improvement centers and most of these sellers sometimes make the installation process sound very simple but most time it isn’t.
How hard is it to epoxy a garage floor? While this process requires preparing and inspecting your floor, you need to test the moisture level of the floor, profile the garage floor before starting the installation process.
Applying an epoxy garage floor coating is time-consuming and also requires a little bit of hard work and the understanding and this makes it not as simple as some companies make it sound.
Read: Disadvantages of epoxy flooring
How to Apply Epoxy on a Garage Floor
Table of Contents
- 1 How to Apply Epoxy on a Garage Floor
- 1.0.1 Prepare your Garage
- 1.0.2 Inspect the Garage Floor
- 1.0.3 Test the Moisture Level of the Concrete
- 1.0.4 Clean the Garage Floor
- 1.0.5 Repair your Garage Floor
- 1.0.6 Profiling the Garage Floor
- 1.0.7 Installation Process
- 1.0.8 Base Coat Application
- 1.0.9 Adding Decorative Chips
- 1.0.10 Applying the Top or Finish Coat
- 2 Conclusion
Although the application of an epoxy garage floor coating can be carried out by one person, it is recommended that a minimum of two people undertakes the job.
This is because higher solids like epoxy are very time sensitive so the application process has to be carried out as soon as possible.
Using two or more installers also helps to reduce the anxiety that some people experience when working alone, which thereby reduces the chance of errors, and it ensures that a large area of your garage floor is covered in a shorter amount of time.
Prepare your Garage
Having poor floor preparation can lead to the failure of garage floor coatings. Preparing your floor isn’t an easy task and it’s very time invasive but the whole work will definitely pay off in the end.
Even with a high-end epoxy product, poor floor preparation can also lead to its failure.
Aside from poor floor preparation, another cause for failure is applicator error. This usually occurs due to vague and not detailed enough instructions.
When this happens, the DIY installer has to guess and carry out a trial-and-error experiment with the application.
As a DIY installer, have adequate knowledge of the process helps to significantly reduce Applicator error.
Before embarking on the application process, it is important you thoroughly read through the application instructions at least twice before starting the process.
If the instructions are not clear if you have any questions you can call the vendor where you purchased the product or the manufacturer of the product.
Read: Disadvantages of epoxy flooring
Inspect the Garage Floor
Before you go out to purchase any coating, you need to first inspect the garage floor to make sure the concrete is compatible with the floor coating. If the floor is sealed or painted the Epoxy will not stick to it well.
This also includes any curing or sealing that might have been applied to the concrete after it was poured. If the floor has any type of sealer it will need to be removed first by mechanical means such as grinding.
If you are unsure if your floor has sealers or not you can carry out a simple test to determine the presence of sealers.
Simply sprinkle some water on the floor surface and if the water beads up immediately without turning the surface darker, then the floor is likely sealed which will need to be removed.
If the water doesn’t bead and the concrete turns darker as the water seeps into the concrete, then there’s no sealer on the floor.
If this test was not able to correctly determine the state of the floor or if you are skeptical about the results then you can go ahead and carry out some acid etching at a small portion of the floor.
If it immediately begins to turn yellow and fizz then there’s no sealer on the concrete but if the acid just sits there with little to no reaction, then there’s sealer present on the concrete.
You also need to take note of any cracks, pitting, or spalling that needs to be repaired. Because although epoxy is self-leveling, it will not fill in cracks.
So If you have extensive cracks or repairs that need to be done, you may need to consider another garage floor covering option like interlocking tile or garage floor mats instead.
if you have newly poured concrete, you need to allow it cure for a minimum of 30 days if you have the regular 4” thick slab before applying an epoxy coating.
Curing concrete helps to release moisture that can cause an epoxy floor to delaminate if installed too early.
Read: How to clean oil off garage floor
Test the Moisture Level of the Concrete
After stripping off the sealer from the floor, the next step is to check the garage floor for any visible signs of moisture, you can even carry out a moisture test to correctly determine the results.
Check the garage floor for any area of damp concrete or efflorescence.
Efflorescence is a white powdery substance that is formed as a mixture of lime and other minerals that is carried to the surface by moisture that rises up from beneath the slab.
At the surface, the moisture evaporates and leaves behind the white residue.
Efflorescence can also be caused by moisture being collected at the surface of the concrete due to condensation. This situation is also known as concrete sweating which is more common during humid periods of the year.
Efflorescence caused by condensation will not affect the application or turnout of an epoxy garage floor coating as long as it is removed before the application.
If there are visible signs of moisture, you can carry out a calcium chloride test to check to see if your garage floor is suitable for an epoxy coating.
Most epoxy coating products can withstand up to 4 pounds of moisture flow per 1000ft² per 24 hours.
After getting a result from the calcium chloride test and you have moisture issues it is best you consult with the epoxy manufacturer or vendor first before going ahead with the process.
Sometimes your garage floor might even look dry but moisture could be evaporating off the surface quicker than it can form a fog or any visible sign thereby making it invisible to the naked eye.
You can also do the plastic sheet test to check if the concrete shows any visible signs of moisture.
Read: What does mold smell like
Clean the Garage Floor
After determining that your floor doesn’t have moisture issues and it will accept an epoxy coating, the next step is to thoroughly clean the garage floor.
If you have a newly installed floor that is free from any oils or greasy residues, all you need to do is thoroughly sweep it and you are good to go.
You need to remove any oil or grease stain from your garage floor making sure to pay extra attention to areas that may have absorbed tire pressing.
These areas may act as a sealer thereby repelling water which causes the epoxy to not adhere to the floor properly.
If you need to protect your walls from water while you clean, you can tape some cheap plastic drop cloths to the wall during this process.
Repair your Garage Floor
After cleaning your garage floor, you will need to make repairs to any area of the garage floor that needs it.
When applying a garage floor coating, do not use a latex crack repair product because latex products are very soft compared to epoxy.
Also, latex repair products tend to shrink as they age and this can create a depression underneath the epoxy floor coating that can highlight the repair.
Placing latex product underneath epoxy coating can cause application as epoxy does not stick well to latex.
Read: 4 Things to know about Latex flooring
If you want a seamless finished look and also want to fill in the contraction joint it should be done before the coating application.
When making crack repairs you also need to make sure that the surface of the affected areas of the garage floor is smooth and flat in order to ensure a seamless finish.
Anything otherwise can lead to the repaired areas and seams being visible underneath the coating.
One great fix is to grind these areas after the repairs have cured to create a smooth and even transition that will be even throughout.
If you have extensive repairs to carry out you can go heavy with the color flakes if that’s the look you are going for. The color flakes will help to hide small imperfections in the concrete.
Profiling the Garage Floor
Once the concrete has been cleaned thoroughly, the next step is to profile the garage floor.
Profiling is a process used to expose the pores on the surface of the concrete in order for the epoxy to flow in and create a secure bond. This is one of the most important parts of garage floor preparation.
There are two ways you can do this either by acid etching or grinding the surface of your garage floor to achieve the proper profile.
Grinding the floor is the most recommended method by many professional installers and epoxy manufacturers, but you can also make use of a proper acid etch for most applications.
Make sure to clean up the entire floor after grinding and remove dust and debris from the floor using a good shop vac. You need to be able to run your fingers over the concrete floor without it coming back white.
Although you will not be able to totally clean the dust from the floor it shouldn’t coat your finger when you run it through the floor. Keep vacuuming and sweeping until your hand is just barely coated with dust.
For a thorough cleaning you can wipe the surface down with denatured alcohol on a microfiber pad, this will help to remove the dust more efficiently.
If you want to acid etch your floor, you need to make sure the garage floor has had enough time to dry completely before applying the epoxy.
Skipping this wait time can cause moisture to be released from within the concrete and this can sometimes create bubbles or even delamination issues.
Unless you are making use of a water-based epoxy primer that allows you to apply it on damp floors, you will need to wait at least 24 to 48 hours so that the floor dries completely.
If you have more humid weather, the drying process can take more time. You can place fans in the area to help facilitate the drying process.
Installation Process
To correctly and safely install an epoxy coating there are certain tools and materials that you need to have. Here’s a comprehensive list of all the tools you will need to install your epoxy garage floor
- PPE & clothing like Disposable protective gloves, Safety Goggles, Rubber Boots, Long sleeve pants and shirt and Protective masks or respirators
- 5-gallon or larger mixing pail
- Paddle mixer for drill
- Cordless or corded drill
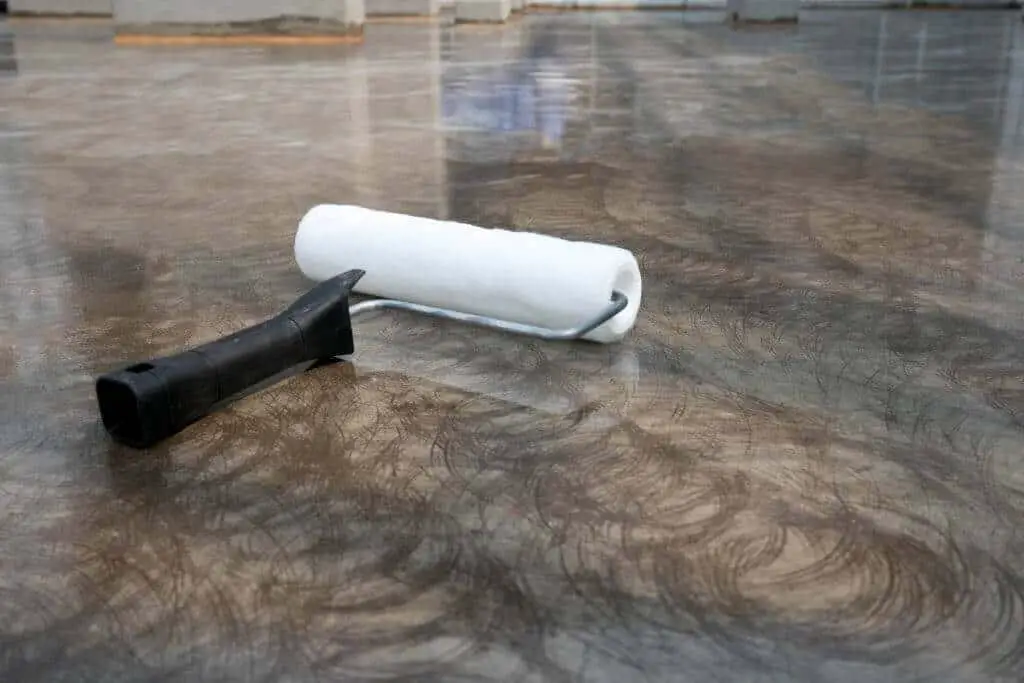
- Paint Rollers and Paint Brushes
- Paint roller handle
- Paint stir sticks
- Acetone or MEK for cleanup
- A rubber or foam squeegee
- Rags and drop cloth
- Low adhesion painter’s tape
- Broom
- Stiff bristle brush with handle
- Hose
- Pump style garden sprayer
- Air compressor with an air gun or leaf blower
- A pressure washer
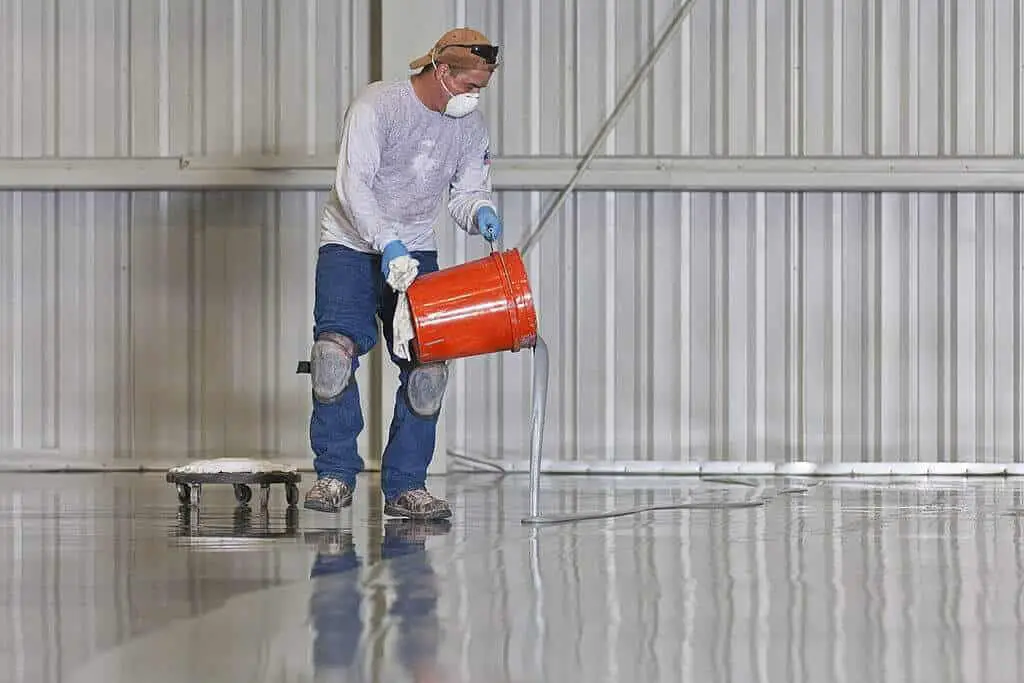
Base Coat Application
After prepping the entire floor surface it is time to apply the base coat. Start by removing any dust from the floor surface using an air compressor, this will enable you to achieve a cleaner floor.
You will also need to tape off the edge where the concrete floor meets the driveway when doing the garage floor. Areas like the wall that is not going to be coated should also be taped off.
Mix the base coat at a location close to the area being coated and also make sure the area is as flat as possible to allow proper proportions of coating and hardener to be mixed.
Ensure to apply the epoxy exactly as directed by the manufacturer of the epoxy coating using the recommended quantity of product to apply for a given coverage area and desired coating thickness.
Then using a mixing bucket, paddlewheel mixer, and drill, mix the correct amount of part B hardener to the part A coating.
Unless the application area is very small, you should work in sections, so that you mix only the amount of product enough to cover each section. After mixing the product thoroughly you can begin applying the coating.
Make sure to wear the appropriate PPE and use spiked shoes if possible, this helps to reduce any bodily contact with the flooring surface.
You can apply epoxy coatings by either dumping the coating directly onto the concrete and then smoothing it out using a squeegee or paint roller.
When applying epoxy coating you have to keep in mind that it is a self-leveling product so you need to make sure that you get a consistent treatment and eliminate any air bubbles that might form during the process.
Try Working the coating with the squeegee in right-angle directions until it has a smooth appearance. Keep mixing more epoxy as you move on to the next section.
As you work, keep an eye on the paint roller condition, and change it out if it becomes too stiff to create a smooth finish.
Read: How to paint tile floors with epoxy
Adding Decorative Chips
Once the base coat begins to cure, you can check the surface appearance to make sure there’s no bubbles forming.
Ensure to follow the manufacturer’s suggested wait time before adding decorative flakes or chips, you should only add decorative flakes after the floor as completely cured
Although Some appliers suggest tossing the chips upwards towards the ceiling and allowing them to disperse more uniformly upon the surface, as opposed to just tossing them downwards, as it may result in lots of chips clustered over smaller patches.
Apply as many decorative flakes or chips as you desire making sure to apply it in sections following the base coat application.
Applying the Top or Finish Coat
After applying the base coat and decorative flakes, it is time to apply the second coat which is the epoxy finisher.
The finisher or topcoat can be applied in the same process as the base coat, simply apply it directly to the floor and smooth it out with a roller or squeegee.
Some epoxy product kits may also include an anti-slip abrasive, such as aluminum oxide powder, that can be mixed in with the topcoat to produce a less-slippery surface.
Having an anti-slip abrasive is also important for applications on steps where a fall is more likely to occur.
After applying the topcoat and allowing it to sit overnight, the floor should look like a showroom. Then give it a quick sweep and a polish and the floor will become attractive, easy to clean, and will also help to keep your floor damage-free.
You can make use of Acetone or MEK to clean up any tools or spills, and then properly dispose of any used rollers, brushes, paint sticks, and any other disposable items.
To clean epoxy floors, you only need a dust mop or swiffer, or vacuum, but be sure to clean up any spills promptly as they occur.
The epoxy floor coating should last you for years and also provide protection as well as improved light reflection, which makes it easier to spot that dropped fastener.
Make sure to check the product manufacturer’s recommendations for how long you should wait before returning items back to their spot on the floor.
The amount of time you would need to cure your epoxy floor for also depends on factors like temperature and humidity in the area.
Before parking your vehicle over a newly installed epoxy floor on your garage floor make sure to follow the manufacturer’s advice to avoid hot tire pickup.
Conclusion
Knowing how hard it is to epoxy a garage floor will enable you to determine if you can undertake the task or if you should seek the services of a professional. Applying epoxy to a garage floor requires a professional hence it’s difficulty depends on whoever is applying it.