Floating floors are available in a variety of materials, like engineered hardwood, laminate, and cork. They are very beautiful and look quite similar to the real deal; it’s no surprise that more homeowners are starting to install floating floors.
But the most common question most people ask before installing a floating floor is, “do you put floating floor under appliances?
No, it is not advisable to put floating floor under appliances because the weight of appliances, especially refrigerators, can stress or break the tongue-and-groove fasteners.
Because of the type of construction and installation process of floating floors, this is an important question to ask before going ahead with the installation process of a floating floor.
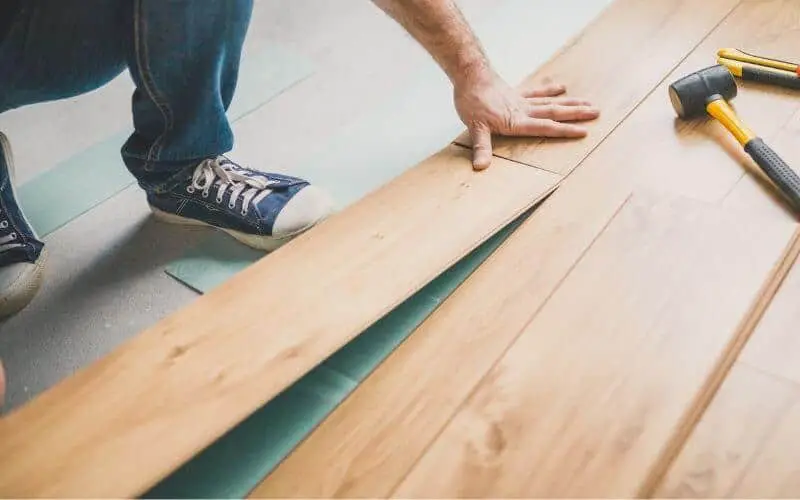
Floating floor has a tongue-and-groove construction that allows you to snap the pieces together without using nails or glue to hold them down to the floor.
Read: Can Engineered Wood Floor be Refinished?
How To Install Floating Flooring In Kitchens
Table of Contents
Before installing floating flooring in kitchens, you need to ensure that the existing floor is relatively even, with no visible waves.
Using a floor that is not very strong will cause small holes and indentations on the floor’s surface. If the floating floor installation will raise the floor’s level more than 1/2-inch than an adjacent floor, you may need to remove the existing flooring to bring down the level.
Installing floating floors have several advantages:
- A barrier against moisture invasion, which is a plastic membrane, is placed between the concrete and the flooring.
- Because floating floors are not attached permanently to the existing flooring, some movement is allowed.
- Engineered wood flooring has much more stability and is also more moisture-resistant compared to solid wood.
It is very easy to install prefinished floating flooring, and if you have little expertise in installing floors, you should be able to do it yourself. Here’s a step-by-step process on how to install floating floors.
Materials and tools you will need:
- Engineered or laminate floating flooring
- Foam underlayment and recommended tape
- Shims
- Tape measure
- Hammer
- Tapping block or pull bar
- Circular saw or other power saws
- Utility knife
- Trim saw
- Flat pry bar and wide putty knife
- Combination square and pencil
Step 1
Before you install the planks, you would need to allow them to sit in the room for at least two days so that they can acclimate to the humidity of the room, take out the planks from the cartons and distribute them evenly throughout the room.
When installing a floating floor over a concrete floor, start by installing a moisture barrier of polyethylene sheeting that is at least six mil thick. Tug the sheets to remove any wrinkles and overlap the seams by at least 8 inches or more. After which, you can roll the foam underlayment over the polyethylene.
Read: How to remove wrinkles on carpet
Step 2
To prep the floor, start by removing the baseboard shoe or the baseboard itself. Then cut the line between the trim and the wall; this will help prevent the paint from cracking. To protect adjacent surfaces, you can use a wide putty knife and pry with a flat pry bar.
Clear the floor of dust and debris by vacuuming or sweeping. Then roll out the foam underlayment, and remove any wrinkles by tugging gently. Use a utility knife to cut the underlayment and join the sides of the pieces together, making sure not to overlap them. Use adhesive tape to hold the joints together.
Step 3
If necessary, you may need to rip-cut the first planks. Along one wall, start to snap the first row of planks together, ensuring that their tongues face outwards when you get to the end of the wall; measure and cut out the last piece.
If the size of the last piece is shorter than 6 inches, you can simply unsnap one plank. After which, you can center the remaining planks and cut out longer pieces for each end.
When cutting the planks, make sure that they come 1/4 inch short of the wall on each end. Make use of a combination square to outline a square line on the backside. Then using a power saw, cut it out.
To avoid ending up with an unattractive narrow sliver along one wall, take the width measurement of the room and divide the result by the width of the planks; the remainder you would get equals the required width size of the final board you will install.
If the remainder is almost as wide as a full board, you can make use of a full board. But if not, you can add the remainder to the width of a plank and divide the result by 2. Then rip-cut the first and last plank to this width.
Step 4
Install the first set by snapping them together end to end. Push them against the wall, and then insert 1/4-inch spacers every foot length.
This space will enable the planks to expand during changes in temperature and humidity; when the planks are pressed tight against the wall without any space, they may buckle during temperature changes.
Step 5
Install the rest rows of planks in the same manner. But remember to offset the planks by at least 3 inches or as recommended by the manufacturer. This means that the cuts you will need to make on the second row of planks will differ from those made on the first row.
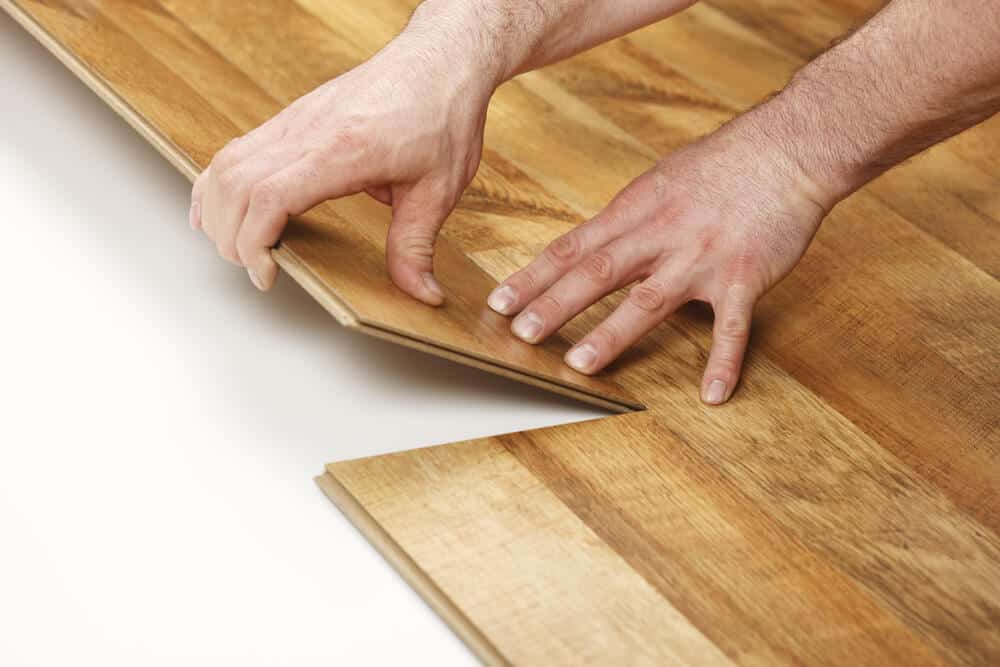
An easy way to snap your plank by its side is by tilting the second plank and pushing its groove onto the tongue of the first plank. Then lower the plank until it snaps into place.
To install the second row, tilt and snap the next piece of planks and slide it over, so it engages with the first piece. Or you can assemble all the pieces of the second row together first before snapping them into the first row.
When installing the planks, ensure to check continually for gaps. To close up gaps, you can use a scrap block of wood and a hammer.
You can also use a special pry bar to help slide planks over, so they snap end to end; it is often supplied by the flooring manufacturer. Place one end of the pry bar onto the end of the board, and tap on the other end till it snaps.
Step 6
When you reach the last row, place shims against the wall and measure out the width in several places. If you have a straight wall, you can cut out the planks to be the same width, but it is advised to cut each plank individually. You can make use of a circular saw with a clamped straightedge or any other power saw.
To snap the final row in place, pull and tilt as you lower it. You can use a tapping block or a pull bar to tighten up and close up any gap in the last row.
Step 7
After installing the entire rows of planks, you can go ahead and reinstall the baseboard. The nails should be driven into the wall, not into the flooring; this is so that they will be able to move slightly to accommodate temperature and humidity changes.
You also need to seal off all exposed edges so that moisture cannot infiltrate into the flooring when a spill occurs. This is highly important, especially when the flooring was installed in a bathroom or utility room, but you should also seal the floor even if installed in the living area.
You should always follow the flooring manufacturer’s instructions: you may be required to use either glue or silicone caulk.
Read: How difficult is it to replace floor Joist
Conclusion
This article answers the question; Do you put floating floor under appliances? And also gives you the step-by-step process on how to install floating flooring in kitchens.
Floating flooring is becoming popular amongst homeowners, and it’s for the right reasons, they are cheaper to install and maintain compared to the original hardwood floor

