Falling a heavy item on your porcelain tiles could cause a large crack or dent that would have you seeking a new floor; even if the old flooring isn’t damaged, you may want to install a new flooring if the style of the existing floor feels outdated and you want something new.
Whatever the reason for the change, you would need to know how to remove porcelain tile from concrete floor before you can begin a new flooring installation.
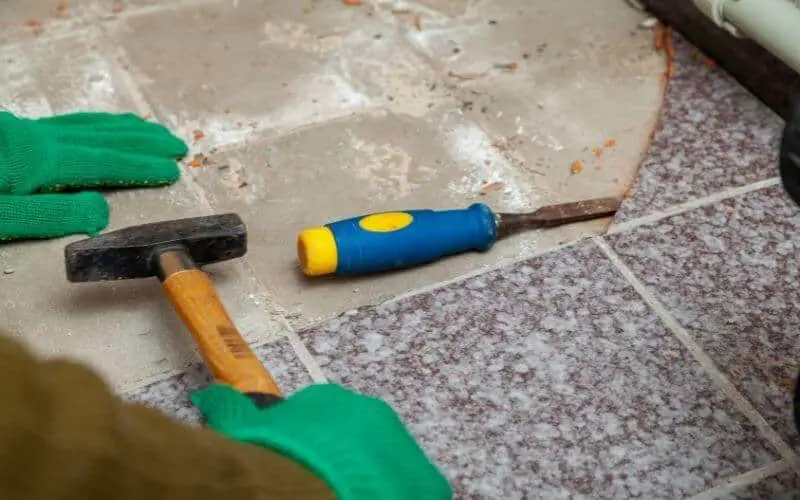
Removing porcelain tile from concrete floor involves prying a chisel under the tile, using a rotary drill with a chisel head will make the tile removal a lot easier. After removing the tiles, remove the morter and other adhesives using a chisel.
If you have a concrete subfloor, you would need to remove porcelain tile from concrete floor, and this article teaches steps on achieving that. This process can be used for any type of tiles, such as ceramic or porcelain tiles, or even natural or travertine tile.
Read: How to clean ungalzed porcelain tile
How to Remove Porcelain Tile From Concrete Floor
Table of Contents
Before you proceed with the project, you will need to get the following tools handy:
- Safety goggles
- A dust mask
- Protective, padded gloves
- Protective clothing
- Knee pads
These safety pieces of equipment will protect you from tile shards that are sent flying during the removal process. You will also need a variety of tools for the tile removal; they include:
- Cold chisel
- Hand maul
- A dustpan and brush
- A wet/dry shop vac
- A rotary drill with a chisel attachment
When working on a very large area, you can opt for a jackhammer with a chisel attachment, which is a larger version of a rotary drill, or even an automatic tile stripper.
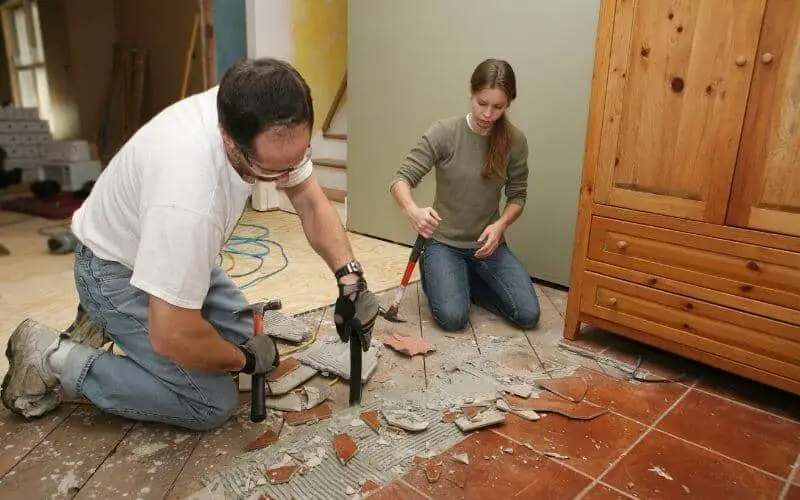
1. Prepare the Space
Start by making necessary preparation the space needs before proceeding with the removal process. Take out everything from the room, as the tile shard can damage furniture and fittings!
Remove all moveable furniture such as cabinets and toilets that can easily become damaged. Any item that cannot be moved should be covered with something protective.
Also, take out the trim and baseboard of your floor, removing anything standing between you and the tiles you are preparing to remove.
Read: How to remove ceramic tile from plywood
2. Remove Tiles
After making the necessary preparations, you can begin the tile removal. This follows a similar process whether you are doing this by hand or using a machine. Begin with a broken tile or between two tiles. Pry the chisel underneath the tile and work them loose from the floor.
Some tiles may come up from the floor easily, while you can find others difficult to remove. Strike difficult tiles into pieces in order to make them easy to remove.
Begin at one end of the room and work your way towards the exit, clearing the removed tiles out of your way as you work.
Using a rotary drill with a chisel head will make the tile removal a lot easier; you can get under the tiles without applying too much force, and you won’t be needing the maul. Simply take out the first tile in the row, or open up a space that can fit the width of the tile stripper.
Then place the stripper up against the edge of the wall or remove tile space with the push bar against the next tile, then push the stripper forward like a lawnmower to remove the tiles.
The push bar will chisel up tiles that are picked up by a metal behind the machine; this gets the job done quickly and efficiently.
Once you reach the end of a row, turn around and repeat the same process until you cover the whole floor.
Read: How to remove scratches from porcelain tiles
3. Remove Adhesive
After removing the tiles, you will probably notice some leftover mortar or other adhesives on the floor. You can use a chisel to scrape off the adhesive.
You don’t need a thorough cleanup; you only need to make sure that the pieces of adhesive left behind are no greater than 1/8th of an inch thick.
To make the removal easier, you can use a solvent chemical like vinegar and other acidic cleaners to dissolve the residual tile adhesive. The right type of solvent to use depends on the type of adhesive you are removing.
Ensure to keep the space well ventilated, as you use these solvents due to the toxic chemicals they release into the air. Also, remember to use a solvent suitable for the underlying concrete.
Read: How to remove tile adhesive
4. Restore Your Floor
With the tile and adhesive removed, you have reached the end of the process; however, your concrete slab may not be in great shape and would need some restoration.
The type of repair to carry out on the concrete slab depends on the type of flooring you are planning to install.
For tiles, even out the floor surface by applying a thin layer of mortar not more than 1/8th of an inch thick to get it ready for the new installation.
If you do not want to install new flooring, you can restore the appearance of the concrete slab by evening out the floor with self-leveling concrete. Using a highly viscous concrete mix fills cracks and dips and creates a smooth concrete surface.
Read: Best way to clean stained concrete floor
Conclusion
Having covered some tips on how to remove porcelain tile from concrete floor, removing this tile requires certain technical steps, all of which are explicitly explained in this article.
That said, proper precaution needs to be taking to avoid hurting yourself when removing the tiles, we have stated some tools needed such as goggles, dust mask and knee pads.