Lightening wood floors without sanding is a practical way to restore your floor’s beauty, especially if you have a floor that cannot be sanded.
You can lighten wood floors without sanding by using a store-bought chemical abrasion kit or by buffing and recoating the floor with polyurethane.
Each of these methods is discussed extensively in this article, so if you want to learn how to lighten wood floors without sanding, we have got you covered.
How to Lighten Wood Floors Without Sanding
Table of Contents

Using A Store-Bought Chemical Abrasion Kit
You will need a DIY chemical abrasion kit which you can get at your local hardware or home improvement store.
Use a chemical solution to prepare the flooring and etch the old finish to enable the new finish to bond securely. Then you simply apply a new coat of finish to restore your floor.
Here’s a breakdown of the steps you’ll need to follow for this procedure
You’ll need:
- Cleaning supplies (cleaning solution suitable for hardwood floors, mop, broom, vacuum, cleaning wipes, damp cloth)
- Painter’s tape
- Chemical abrasion kit ( this includes the abrasive pad, abrasive liquid, application block, finish application pad, and finish)
- Plastic garbage bags
- And shoeboxes)
- Scouring pads
- Broom handle
- Dishwashing liquid
- Shoe covers
- Wood stain
- Small paintbrush
- Paint pad or paintbrush
- Rags
- Hairdryer
Directions:
Clear the room by removing any furniture. You also need to remove any partial furnishings or fixtures like floor-length curtains and built-in shelves that would get in the way of the floor.
With the floor cleared out, clean the floor using a vacuum and damp cloth, do not use any chemical cleaner. If there’s embedded dirt, use an abrasive sponge to scrub it off and allow the floor to dry after cleaning.
Plug any heating ducts or vents with old towels, close windows and turn off ventilation systems; this will limit the spread of dust.
Apply the liquid abrasive onto the floor and scrub the liquid with the grain of the floor. Attach the pad to the block and screw in a broom handle, or you can simply go on your knees to make the application easy.
It is recommended that you pour the chemical abrasive into a plastic-lined shallow cardboard box, so you can easily dip the pad, catch drips, and prevent the chemical from spilling.
Work the chemical into the floor one small section at a time, applying a fair amount of pressure to roughen the floor’s surface.
Avoid leaving the solution on the floor for longer than five minutes as it can penetrate into the cracks between the flooring strips and cause damage.
You can open a window or turn on a fan on low in a different room to create some ventilation, although the chemical etching liquid is fairly low-odor. After etching the entire floor, allow it to dry for 30 minutes.
Go in with a mixture of two tablespoons of dishwashing liquid and a gallon of warm water and clean the floor again using a mop.
This neutralizes the etcher and removes any remaining residue. Avoid over-saturating the floor with water to avoid causing any water damage to the floor.
For visible scratches that persist even after etching the floor, use a small paintbrush or a cotton swab to apply some matching stain to such areas of the floor. Blend the stain out and then blot it with a rag.
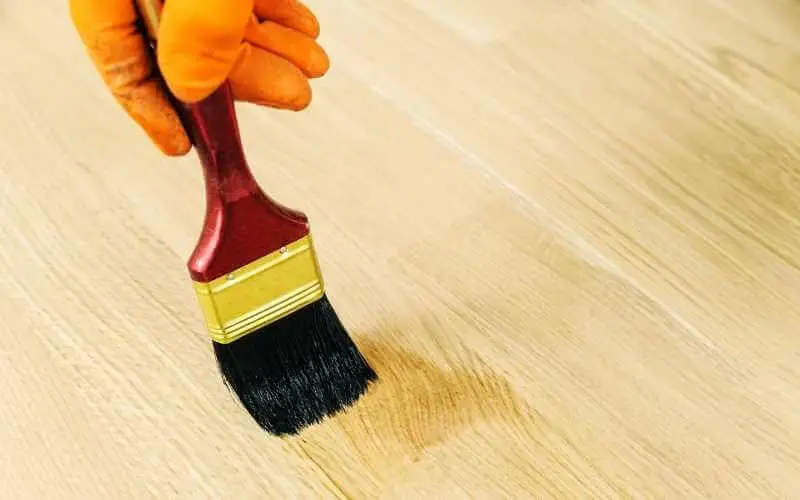
Apply a new finish to the floor and to get a good coating of finish on the applicator and minimize drips; attach the finish applicator pad to the block and pour the finish into a plastic-lined box.
Spread the finish on the floor, coating the edges against the walls and baseboards with a paint pad or brush, then follow behind with the applicator.
Most finish takes about five to ten minutes to get tacky, after which it becomes impossible to smooth out. Do not try to fix any imperfections when the finish becomes sticky, as it’ll do more harm than good.
You usually only need one coat of finish, but you can add a second coat for an extra layer of protection on the underlying wood to hide the deeper scratches, but you have to wait a minimum of three hours before applying another coat.
Allow the finish to dry for at least eight hours before walking on the floor with clean socks, but you should only move furniture in after 24 hours and wait for at least two weeks before laying down an area rug.
Read: How long does it take polyurethane to cure
Buffing And Recoating With Polyurethane
This procedure is quite similar to using the chemical abrasion kit, but you use a buffer to roughen up the floors instead of a liquid abrasive.
Buffing is also a little messier than using a chemical etcher and quite similar to sanding, but you’re only roughing up the existing finish so the new finish bonds better while removing surface scratches and marks.
Items you’ll need:
- Cleaning supplies
- Buffer
- Mineral spirits
- Wood stain
- Small paintbrush or cotton swab
- Sanding screens
- Hammer
- Putty
- Nails
- Box fan
- Plastic sheeting
- Duct tape
- Painter’s tape
- Dust mask
- Polyurethane
- Paintbrush or paint roller
- Plastic garbage bag
- Shoebox
- Paint tray
- Applicator pad
- Applicator block
- Broom handle
If you don’t own a buffer, you can rent one from your local home improvement store.
Start by emptying out the room of furniture and rid the floor of any gunk and dust. Use a cleaner suitable for wood flooring and go in with a scouring pad with mineral spirits for tougher stains.
As you clean, take note of areas with deep scratches, dents, or areas stripped of finish or with exposed nails. Mark these areas with painter’s tape so you can return to them when you’re done cleaning.
Return to marked problem areas and make appropriate fixes; if you have a light-colored hardwood floor, you can make deep scratches or areas with worn-out finish less noticeable by applying some mineral spirits to darken the spot a bit.
Before going in with the buffer, roughen up the corners and edges of the floor with a sheet of sanding screen. Do this by hand as you won’t be able to get into the corners or right up against the baseboards with a buffer. Wear hand gloves and lightly scratch up the current finish without wearing it down or sanding through it.
When your floor is clean, and the edges are roughened, attach a sanding screen under the buffer, but before you begin buffing, prep the room by opening up your windows and placing fans in them.
Also, close air ducts, and seal off the working area; this is to protect your home from the good amount of dust that will be generated during the buffing process.
You can begin buffing the floor but keep in mind that sanding screens usually wear out after 10-15 minutes of use. Check it every few minutes for grit buildup and remove any large pieces of wood that can scratch the floor.
When you have buffed the floor, completely clean up the dust using a vacuum and wipe down the floors.
Finally, apply a finish, and polyurethane is the recommended finish option for DIY-ers because it’s durable and easier to work with compared to other finishes.
Read: How often should you refinish hardwood floors
Conclusion
Lightening wood floors without sanding can be done in two ways; Using a Store-Bought Chemical Abrasion Kit or by Buffing and Recoating the floor with polyurethane.
Both methods are discussed with detailed steps in the articles.