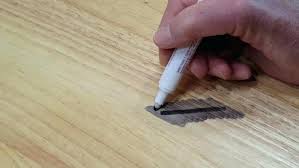
Permanent markers are designed to be permanent! So when they come in contact with surfaces that they are not wanted, it can be tough to remove.
If you erroneously left a permanent marker bleeding your wood floor, or your kid decides to express their artistic skills on your wood floor surface, you are definitely searching for how to get permanent marker off wood floor because it totally ruins the look of your floor.
Fortunately, you can easily remove permanent marker from wood floor with a couple of cleaning solutions you probably already own.
How To Get Permanent Marker Off Wood Floor
Table of Contents
If, after trying out all the listed out methods and the stain persists, replacing the floorboard might be the only way out.
Rubbing Alcohol
Before using this on your wood floor, you need to first test out the reaction it would have by applying a small amount of rubbing alcohol to a small inconspicuous area of your floor
Simply one-quarter cup of rubbing alcohol onto a clean cloth, and wipe the test area with the cloth. Allow the rubbing alcohol to sit on the floor for at least five minutes.
Then use another clean cloth to wipe the area and check out the reaction. If the rubbing alcohol has removed the finish on your floor or left behind a stain, don’t use this stain remover method.
But if there wasn’t any reaction, you can go ahead with the application.
Take a clean rag and pour one teaspoon of rubbing alcohol into it, then use the rag to rub the permanent marker stain. Allow the rubbing alcohol to sit on the stain for at least 3 minutes.
Read: How to get sharpie out of carpet
Then soak a clean rag or sponge with some water and clean the area with the damp rag or sponge. You need to apply firm but gentle pressure when scrubbing the stained area with the sponge or rag so that the marker will come off.
If the stain persists, you can repeat the process until you achieve your desired results.
Baking Soda And Toothpaste
Before we get into the preparatory stage, it is important to note that you should not make use of gel toothpaste for this.
Simply combine one part of white toothpaste with one part of baking soda in a small dish and mix thoroughly with a spoon till it forms a paste.
Spoon some of the paste unto a clean cloth and apply the baking soda-toothpaste paste to the permanent marker and scrub the area with the cloth using a circular motion.
You want to continue scrubbing the area till the stain is lifted, applying more toothpaste and baking soda paste into the rag as needed.
Once the stain is off, get a clean rag and dip it into a bucket with warm soapy water and wring out the excess water. Remove the baking-soda toothpaste paste from the floor with the wet and soapy rag.
Allow the area to air dry properly to prevent moisture damage.
Nail Polish
Like the rubbing alcohol, you also want to test this on a small inconspicuous area of the floor. To do this test, apply the nail polish to the floor by Pouring ¼ teaspoon of nail polish remover onto a clean cloth and wiping the test area with it.
Allow the product to sit on the floor for up to 5 minutes. Then use a damp rag to clean the surface to see if the nail polish had any reaction with the floor. If there’s any form of damage caused by the nail polish, skip this method.
If the nail polish scaled through without causing any harm to your floor, you can continue with the procedure.
Apply the nail polish remover to the wood floor by Pouring one teaspoon of nail polish remover onto a clean rag and scrubbing the permanent marker with the saturated rag.
Allow the nail polish to sit on the stain for at least 3-5 minutes, then dampen a clean rag with some water and scrub the area with the wet rag. When scrubbing the stain, you need to use circular motions and a firm but gentle pressure till you lift the stain.
If the stain still persists, you can repeat the process.
Dry Erase Marker
You can get dry erase marker at stationery and craft stores and just draw over the previous permanent marker stain with the dry marker. You want to completely cover the entire marker stain with the dry eraser and allow it to sit for one minute, then Use a dry, clean rag to wipe the stained area.
The permanent stain marker should come off as you wipe off the dry eraser. If only part of the permanent marker stain came off, you can always repeat the process or try another stain remover method.
Magic Eraser
You can actually make use of a magic eraser to remove permanent marker stains. Simply take the magic eraser out from its packaging and dip it into a bucket of water or run it under the tap and completely saturate it with water and Wring out the excess water.
Use the wet magic eraser to gently but firmly scrub the stained area in circular motions.
Keep scrubbing till the stain is lifted, and this might take a while. Keep scrubbing, re-wetting, and wring out the eraser as needed.
Use a clean, dry rag to wipe off any moisture residue that has been left on the floor and allow the floor to dry properly.
WD-40
WD-40 is also a product you want to test on an inconspicuous area to see its reaction before using on the stained area.
Just spray the WD-40 onto a small hidden area and allow it to sit for up to 5 minutes and use a clean wet rag to remove the WD-40 before spraying stain remover on the area to remove any greasy residue. Use a wet sponge to wipe up the stain remover.
Check out the area for any unpleasant reaction the WD-40 might have caused and discontinue its use, if any, but go ahead if there isn’t any.
Simply apply the WD-40 directly onto the permanent marker stain and allow it to sit for 3 to 5 minutes.
You can also apply the WD-40 with a cloth by spraying the product unto the cloth and scrubbing the floor with it.
Use a wet cloth to remove the WD-40 from the floor surface, and if the stains aren’t totally gone, you can repeat the process.
Once you achieve your desired results, spray the area with a stain remover to remove any greasy residue that might have been left behind by the WD-40.
To remove the stain remover, wipe the area with a clean cloth. You still need to run over the area with a dry cloth to pick up any remaining moisture after the stain remover is wiped off.
Replacing The Board
This is the last resort when other stain remover process have proved futile. Replacing a board is very labor-intensive and needs a bit of experience.
So try to find out the cost of hiring a professional and compare it with how much it would take you to do it yourself.
If there isn’t much difference, it is recommended you let professionals handle it. But if you are feeling “crafty” and would like to embark on the home improvement project yourself, here’s how to replace a stained board.
What You Need
- saw
- utility knife
- chisel
- pry bar
- measuring tape
- nail gun
- rubber mallet
- Replacement board
- shop vac or broom and dustpan
Step 1
Measure the depth of the stained board and Set your circular saw to cut 1/16 inch deeper than the measured depth of the board; most boards are usually not more than ¾ inch thick.
Also, use the saw to cut 1 line down the length of the floorboard. Stopping the saw just before you reach the end of the stained board. Then move the saw over one inch and cut a second line like the first. Always stopping before you reach the end of the stained board.
Step 2
Use a utility knife to carefully score each end of the stained board. You need to make sure you Do not score the surrounding, undamaged boards
Then Place a chisel in one of the score lines at a 30° angle and gently Tap the chisel along the scored line with a hammer. Repeat the same process on the other scored line.
Step 3
Pry the board off using a pry bar, by Inserting a pry bar into the gap at one end of the stained board and then it Push down to lift up the stained board. You lift up the board with your hand.
Use a shop vac or broom and dustpan to clean any dust and debris that might be created.
Step 4
Measure the length and width of the stained board with a measuring tape and Use these measurements to determine the size of the replacement board and cut the replacement board to the appropriate length and width.
Step 5
Place the replacement board into the floor and tap it into place with a rubber mallet. You can also make use of a nail gun to insert one finish nail into each end of the board to make sure the replacement board is completely flush with the floor.
Step 6
If you used nails, you could cover the nail holes with wood putty and a putty knife. You will also need to use a 220-grit sandpaper to sand the replacement board along the grain once it dries. Use a damp rag to remove any generated dust.
Apply a stain that matches the rest of the floor to the replacement board with a rag, then Remove any excess stain with a clean rag. Allow the stain to dry.
Finally, apply some varnish to the floor as well as some finish. You may need to apply up to 3 coats of oil-based finish or four coats of water-based finish, sanding in between each coat with 220-grit sandpaper.
Read: How to refinish woo floor
Conclusion
So if you just had a messy accident ending with your permanent markers content all over the floor, here’s how to get permanent marker off wood floor.

