Engineered hardwood floors are an economical alternative to solid hardwood flooring. In terms of durability, most engineered hardwood floors can be restored easily by sanding and refinishing.
Suppose you just installed engineered hardwood floors in your home. In that case, it can be quite annoying to discover accidental scratching or chips.
This brings us to the next question on how to fix a chip in the engineered hardwood floor. There are various methods, such as covering the chip with a wood stain marker or apply a light coat of oil or stain.
We will discuss various methods on how to fix a chip in the engineered hardwood floor. Stay tuned.
Read: How to fix engineered hardwood floor popping noise
How to Fix a Chip in Engineered Hardwood Floor
Table of Contents
Not that the methods discussed in this post, to a large extent, depend on how serious the chip is. If you’re dealing with an extremely deep chip, the methods discussed here might not be so effective.
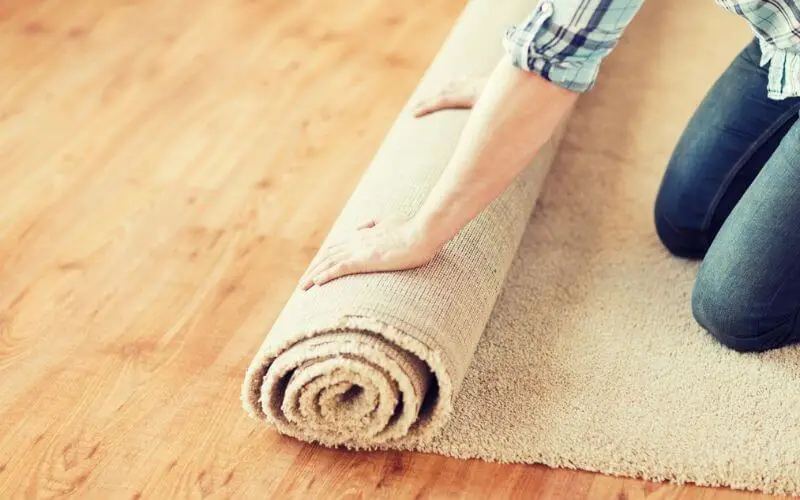
You can either hide the chip with a rug or a piece of furniture or replace the plank of wood flooring. Below are some of these methods:
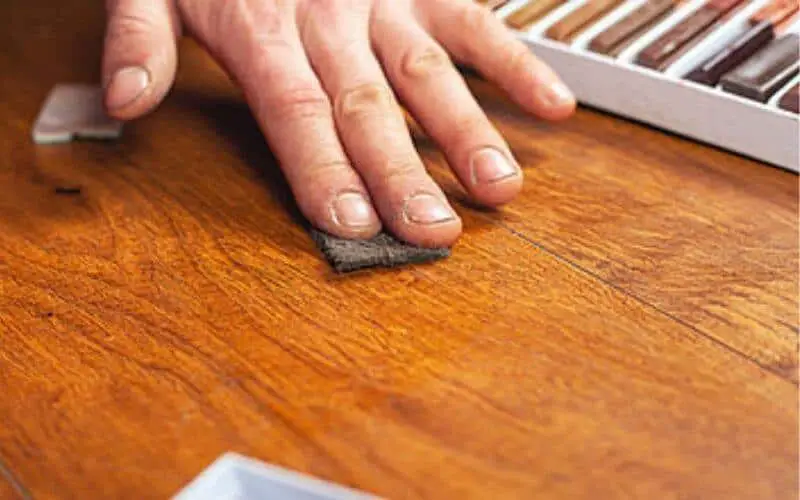
Use a Wood Stain Markers to Cover the Chips
If you are dealing with a small chip, you can easily tackle it with a wood stain marker. Wood stain markers are readily available in most home improvement stores and are quite effective for scratches and chips in wood flooring.
Most importantly, wood stain markers are quite affordable. You can easily pick up two or three markers to ensure you get the best possible color match for your floor. Alternatively, you can take a sample of your flooring so you can get the exact color.
To ensure you got the exact color of your floor, you can test it in an inconspicuous spot affordable on your wood flooring to see which matches best (preferably a closet or under a piece of furniture).
The wood stain marker is quite easy to use. Just follow the instructions on the marker and watch the scratch or chip disappear before your eyes.
Apply a Light Coating of Oil
If you have a can of floor oil lying around in your garage or storage room, now might be the right time to put it to good use.
This method is effective for shallow chips and scratches. If the reverse is the case, you’ll probably need to either sand the affected area. Clean off sandpaper dust from the area before applying some coat of oil to the damaged area.
A cotton wool stick or small paintbrush can be used to apply the stain. Allow the stain to dry thoroughly before buffing it with a soft cloth.
Use a Floor Wax Repair Kit
A repair kit is effective in fixing chips on engineered hardwood floors. To start, wipe the affected area with a small amount of rubbing alcohol. Make sure to clean the area is free of any dirt or debris that might have been pushed into the scratch during everyday wear and tear.
Make sure the floor wax repair kit has a color that matches your floor. Mix the wax as per directions included in the kit and use a plastic putty knife to apply it over the chip. Make sure the mixture is pressed down into the scratch at a diagonal angle.
Use cotton and lightly buff the floor to get rid of any excess wax left on the floor. This should be done carefully to avoid removing any of the wax on the affected area.
Read: best floor wax for linoleum floors
How to Fix Chip in Wood Floor
Chips and scratches on wood floors are not only unattractive but can be slightly dangerous. It is possible to snag your socks on these chipped edges and end up with a splinter in your toe!
Thus, we are interested in how to fix chips in wood floors. To fix such chips, you will need the following materials:
- Hard wax that matches your floor
- Hot iron
- Metal or plastic scraper or 5-way tool
- Rag
Follow the steps outlined below to fix chips on your beautiful hardwood floors:
Warm the Iron and Get the Right Wax
As mentioned in the tools needed to fix chips on wood floors, you need a hot iron. Sometimes, getting the wax color that fits your floor might be a bit difficult. In such cases, you will have to mix a few wax colors to get the accurate color.
Once you get the colors that will give you the perfect blend, melt the colors with the hot iron and let it cool.
Melt Wax into the Affected Area
After getting your desired color, it’s time to apply the wax on the affected area. You can use a putty knife to put the wax on top of the chip, then press the hot iron into the wax to fill the area.
Keep on adding more wax until you get a buildup of wax. You want to have excess wax to scrape off to make the area flush and smooth.
Once the area is filled up, give it some time to cool off (the wax is fully cooled when the color becomes a bit duller than before).
Read: How to tell if floors are engineered hardwood
Scrape Off Excess Wax and Recreate the Bevel.
Now that the wax has cooled off use a plastic or metal scraper to scrape off the excess, then use a rag to brush off any excess.
Read: How to hand scrape wood floors
Blend in repair
This step becomes important if the color of the wax doesn’t match your floor. If the color is thicker, you can use a scraper or a 5-way tool to make small “wire-brush” scratches in the grain.
Alternatively, you can also use lighter wax that matches the highlights on the board. This might spell out more work for you since it involves using all the steps outlined above.
Note that repair chips on wood floors might take a bit of practice for you to get it right. But once you get it right, it becomes quite easy.
Read: Can engineered wood floor be refinished?
Conclusion
You can save lots of board replacements down the line with these methods discussed in this post. Note that the methods on how to fix a chip in engineered hardwood floor to a large extent depend on how deep the chip or scratch is.
For deep chips and scratches, you might have to replace the entire affected board or, in the meantime, hide the chip under your furniture.