A wooden floor adds warmth and character to a home. But because it’s a natural product, it’s not invulnerable and may suffer from changes in hot and cold temperatures, dampness, or insect problems.
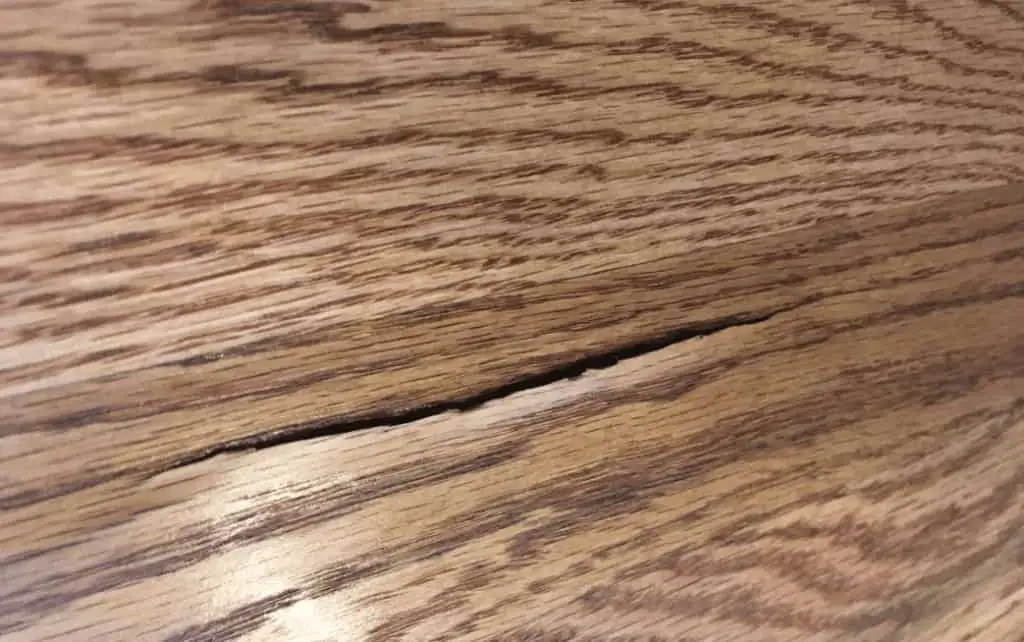
This damage can happen as cracks on the surface. You want to seal these cracks to stop them from getting bigger and spreading across more of the ground. The weather can wreak havoc on more than the exterior of your home.
As the humidity rises and falls, it’s common for gaps or cracks to form and appear in hardwood floors. Hardwood floor cracks and gaps are caused by the wood expanding and compressing.
Hardwood takes on and loses moisture as the temperatures and the humidity rises and falls.
So whether your floors may be newly installed or you’ve had hardwood floors for years, you can reduce the likelihood that gaps will show up in your hardwood floors by using humidifiers.
You can opt to use room humidifiers or furnace humidifiers; both will help minimize the prospect of gaps appearance in your hardwood floors down the road.
If you are already battling with cracks, here are a few tips and tricks on how to fill cracks in wood floor.
How to Fill Cracks Wood Floors
Table of Contents
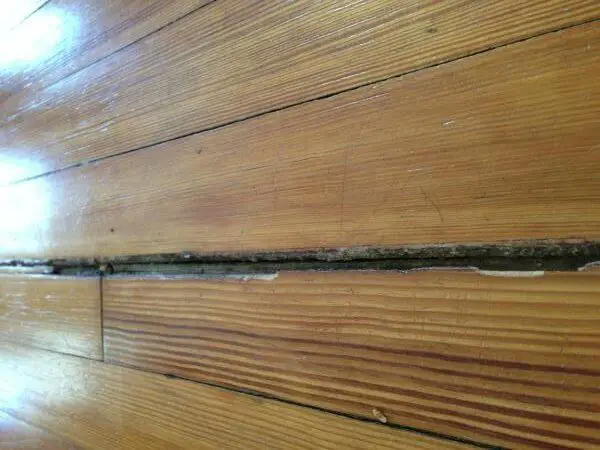
There are several methods to attain this goal, which method to decide on depends upon whether the hardwood floor is finished or unfinished, and also the extent of the damage.
Flexible Gap Fillers
There are quite a number of fillers available on the market which retain a measure of flexibility after drying. These are less likely to be pushed out if the boards swell, making them a great choice to seal narrow cracks.
Using filler is a very simple process that requires a caulk gun and a caulk trimmer or equivalent removal tool.
1. Begin by vacuuming the cracks using a hose attachment. This will help remove any particles that can interfere with the filler’s adhesion to the boards.
2. Cut the tip of the filler tube at a slight angle and insert it into the caulk gun. This angle will allow you to be able to control the filler and avoid uneven application.
3. Apply the filler to the crack as you would regular caulk, then use your trimmer to gently scrape away any excess.
4. Be sure to follow the instructions on the filler tube carefully when cleaning up to avoid leaving stains or other blemishes on your floor.
Pieces of Wood
One popular method of filling larger gaps requires using strips of a similar hardwood your floor is formed from.
Make sure the area is humid to avoid the chance of your wood strip being pushed out the following time your floorboards swell.
Cut the strips and apply wood glue to each side. Next, use a hammer with some kind of padding (or a rubber mallet) to drive the strips tightly between the boards, allowing a small bit to stay above the floor level.
Once the glue has dried, remove the surplus wood by making use of a woodworking plane to make sure that the surface becomes gloss over the patch site.
Note that this method is employed for square-curt boards and isn’t very effective with tongue-and-groove floors.
Rope
An old but still quite popular method for filling large gaps requires a rope. This method harkens back to the times of Arabian shipbuilding techniques and has an extra bonus of providing some minor insulation.
As with using pieces of wood, you’ll want to measure the rope correctly to suit. Avoid synthetic rope, and wedge it into place.
Unlike the strips, you’ll want to be very sure rope fillers are flush with the adjacent boards. The rope can then be stained to match your floor.
Sawdust and Unfinished Floors
One quite simple method to fill gaps in an unfinished floor is to use fine sawdust.
The dust from sanding wood of a similar species is preferable, as larger sawdust may show unwanted texture.
Mix the dust with some of the polyurethane and fill the cracks. Note that this method only works on an unfinished floor and can clash with pre-finished floors.
Whole Floor Replacement
Sometimes the simplest method to repair your floor is to change it entirely. This is very true when the gaps are large, and quite a few in number or there are other signs ruins to the boards like warping or missing slivers.
Even though this is quite an expensive method, attempting to repair a badly damaged hardwood floor can prove much more costly at the end of the day.
Read: How to remove surface scratch on wood floor
Causes of Floor Cracks
Now that we have talked about how to fill cracks in wood floor, now its time to talk about the causes of floor cracks and how we can prevent them.
Hands-Free Maintenance
One of the biggest causes of board shrinkage is low humidity. Hardwood floors can dry out over an extended period of time, and running a little humidifier within the room or your furnace’s humidifier will help you to avoid this problem.
Proper humidity levels in your home will also help to improve your family’s health, so this preventative measure has multiple benefits.
When to Avoid Wood Fillers
You might be tempted to fill the gaps with a wood filler. Unfortunately, this is often not a permanent fix for boards being affected by humidity, because the boards will still expand and contract.
This type of cracking is normal for hardwood, and no filler method will be able to stop it unless the right humidity is maintained. Wood fillers also are not meant to be used with large gaps.
Why You Should Avoid Putty Fillers
Putty fillers were once a crucial part of hardwood floor repair. Over time, however, when the putty hardens, chips, and flakes.
This leaves your hardwood floor looking even worse, and requiring you to dig out the old putty and replace it.
For this reason, only a few floor experts will still suggest employing a putty filler.
Wax as Prevention
While not always popular, floor wax has the advantage of filling the small pores in your wood floor and sealing it against moisture.
This not only prevents damage from spills, but it also helps to keep moisture in the boards from evaporating.
Waxed floors have to be resurfaced periodically, but are less likely to dry out than non-waxed floors. Some finishes can also help reduce the chance of your hardwood floor drying.
Read: How to fix dog scratch
Some Crucial Tips for When Using Wood-filler to Fix Your Floor
- Fill after you’ve sanded through 36 grit. Don’t fill at the very beginning you won’t see all the places that need a fill.
But don’t wait until the ending of the project either because the filler that sticks within the wood grain around the void you’ve filled must be completely removed or it will look like a little halo around each filled spot, once the finish is applied.
- Match the filler to the color of the spot you’re filling, not just to the specie of the entire floor. Maple floors have dark spots, and oak floors have light sections; each and every floor have a minimum of one dark knot.
Use your eyeballs, not just the name of the filler, to guide you. If you’re filling knots, use an ebony fill, or use universal tints to darken a little amount of your red oak fill. But don’t assume that one color will fit all of your filing needs.
- Give your filler enough time to dry before you sand it flush. We recommend applying filler right before stopping for lunch or before you retire for the day. By the time you’re ready to start sanding again, it will be dry.
Read: How to remove scratches on porcelain tiles
Some Extra Tips
- You can use 200-plus-grit sandpaper to smooth down putty, if necessary. A quick smoothing with the rubber putty knife or your finger is typically sufficient, but if you intend on staining the putty to match the surrounding area, you’ll first need to smooth the putty right down to match the floor’s surface.
- Bath powder is often used as a short-lived fix if you’re handling a loose floor that’s also squeaking as a result of the cracks.
You can fill the crack with the powder to muffle and dampen the squeaking until you’ll be able to patch the crack. Then, you’ll simply vacuum the crack out and patch it accordingly.
- You have to understand that cracks are a continual part of hardwood floors, and as your floor continues to contract and expand, it’s going to eventually compress or extract beyond the strain levels of the caulking or putty fillers, causing them to crack also.
Movement can continue for years, and you can go years without much movement in the slightest degree.
Read: How to move furniture without scratching floor
Conclusion
We hope that these few tips and tricks you’ve been able to find out how to fill cracks in wood floor.
As with any repair job for a hardwood floor, it’s important to check with the manufacturer of your hardwood floor as well as the products you’re using to make sure you’re following directions properly.
Floors that have extensive gaps or are in very poor disrepair may require being pulled and completely re-installed so as to properly and permanently fix the whole floor gaps.
Cracks that are too wide or that have split the wood plank into loose pieces could also be too unstable to repair with wood filler.
In that case, you need to remove the old plank and replace it with a new board. This may require professional handling, especially if the damage is in the middle of tight boards or the boards are glued to the subsurface.